
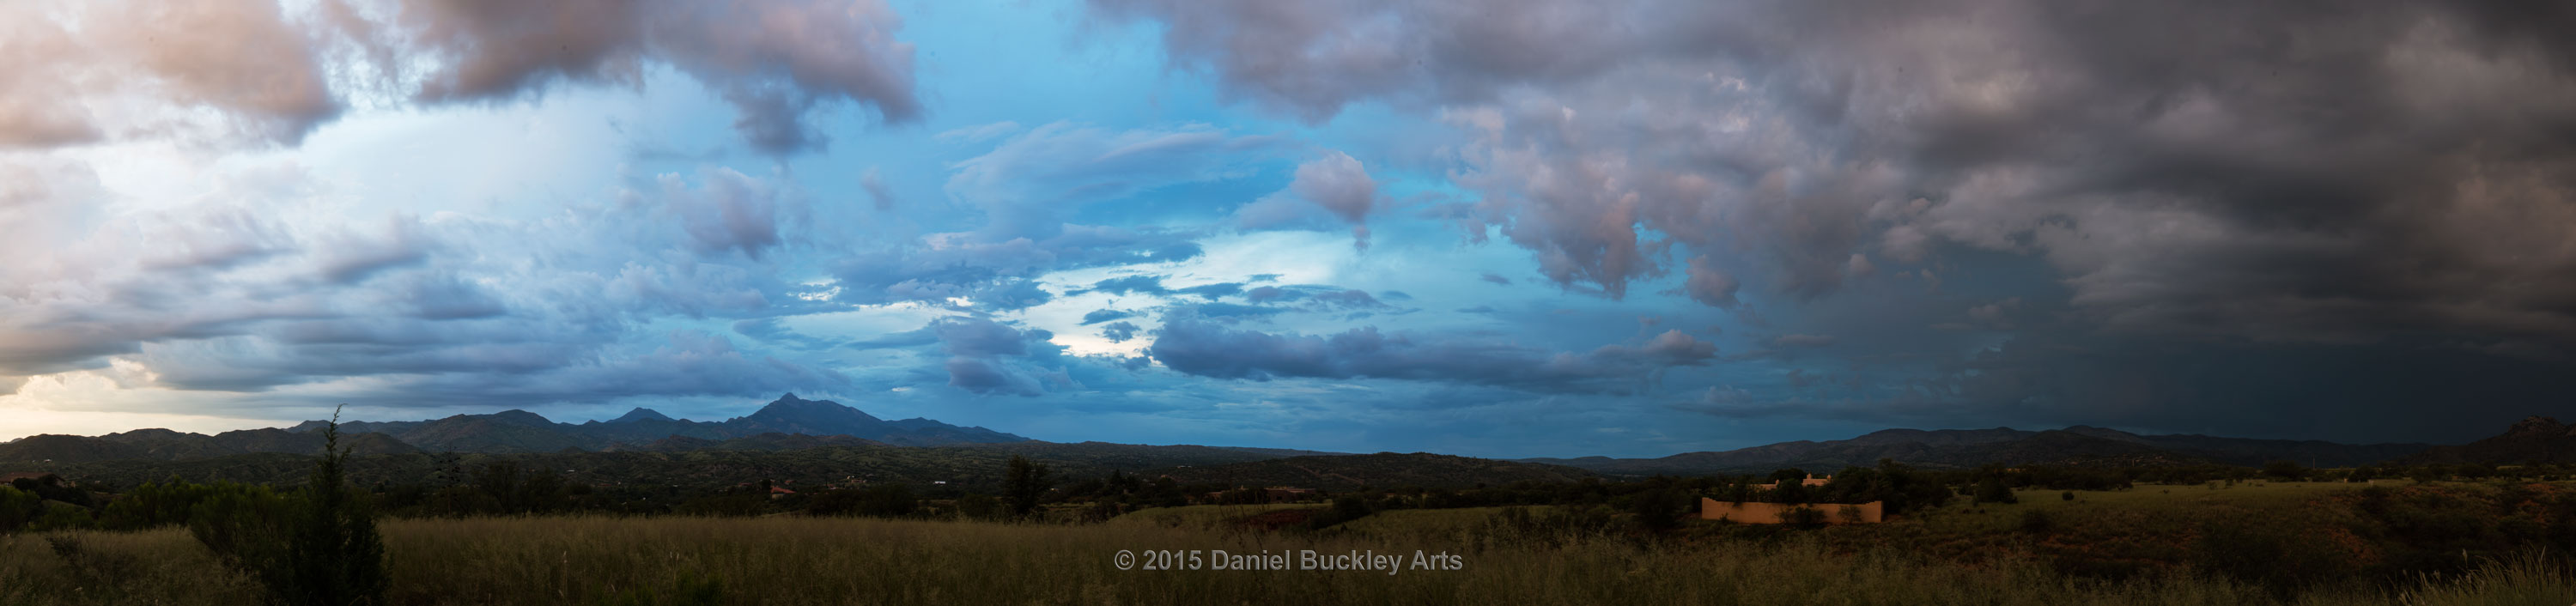
Summer fire and monsoon photography
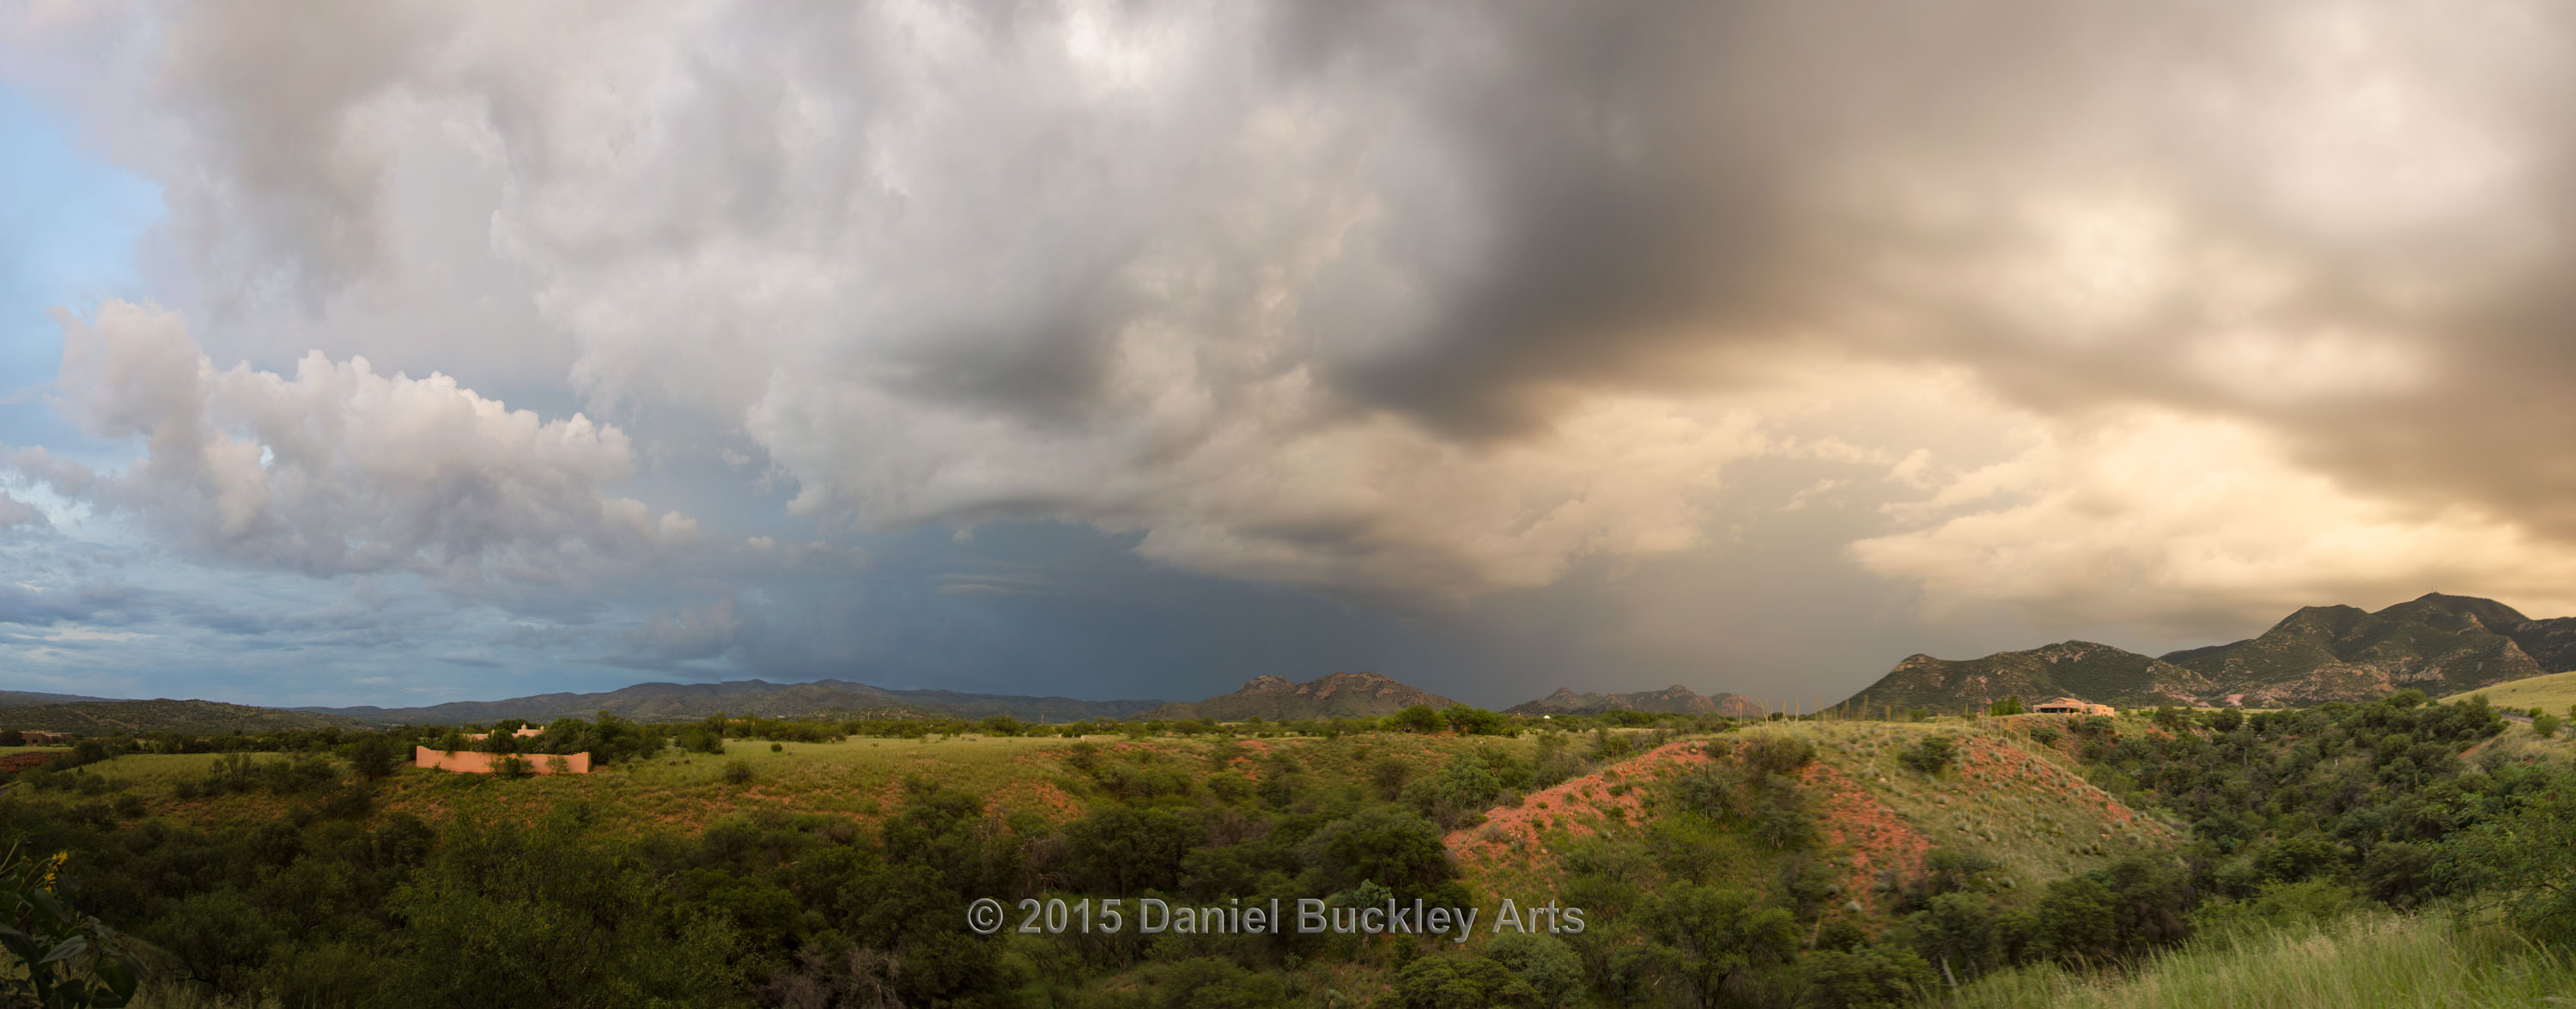
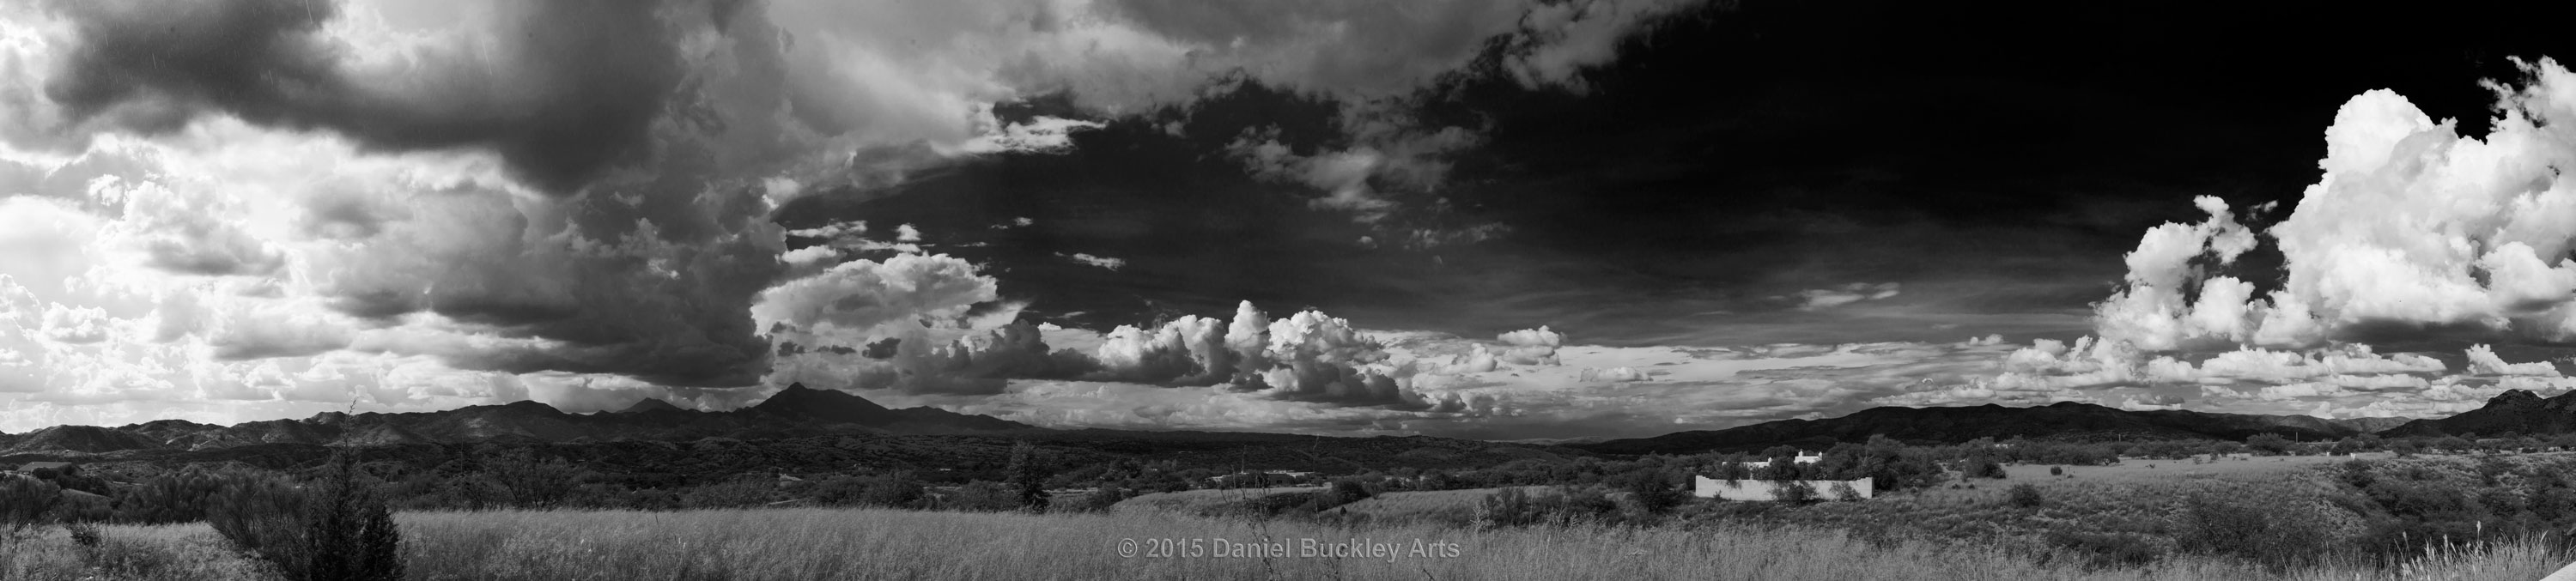
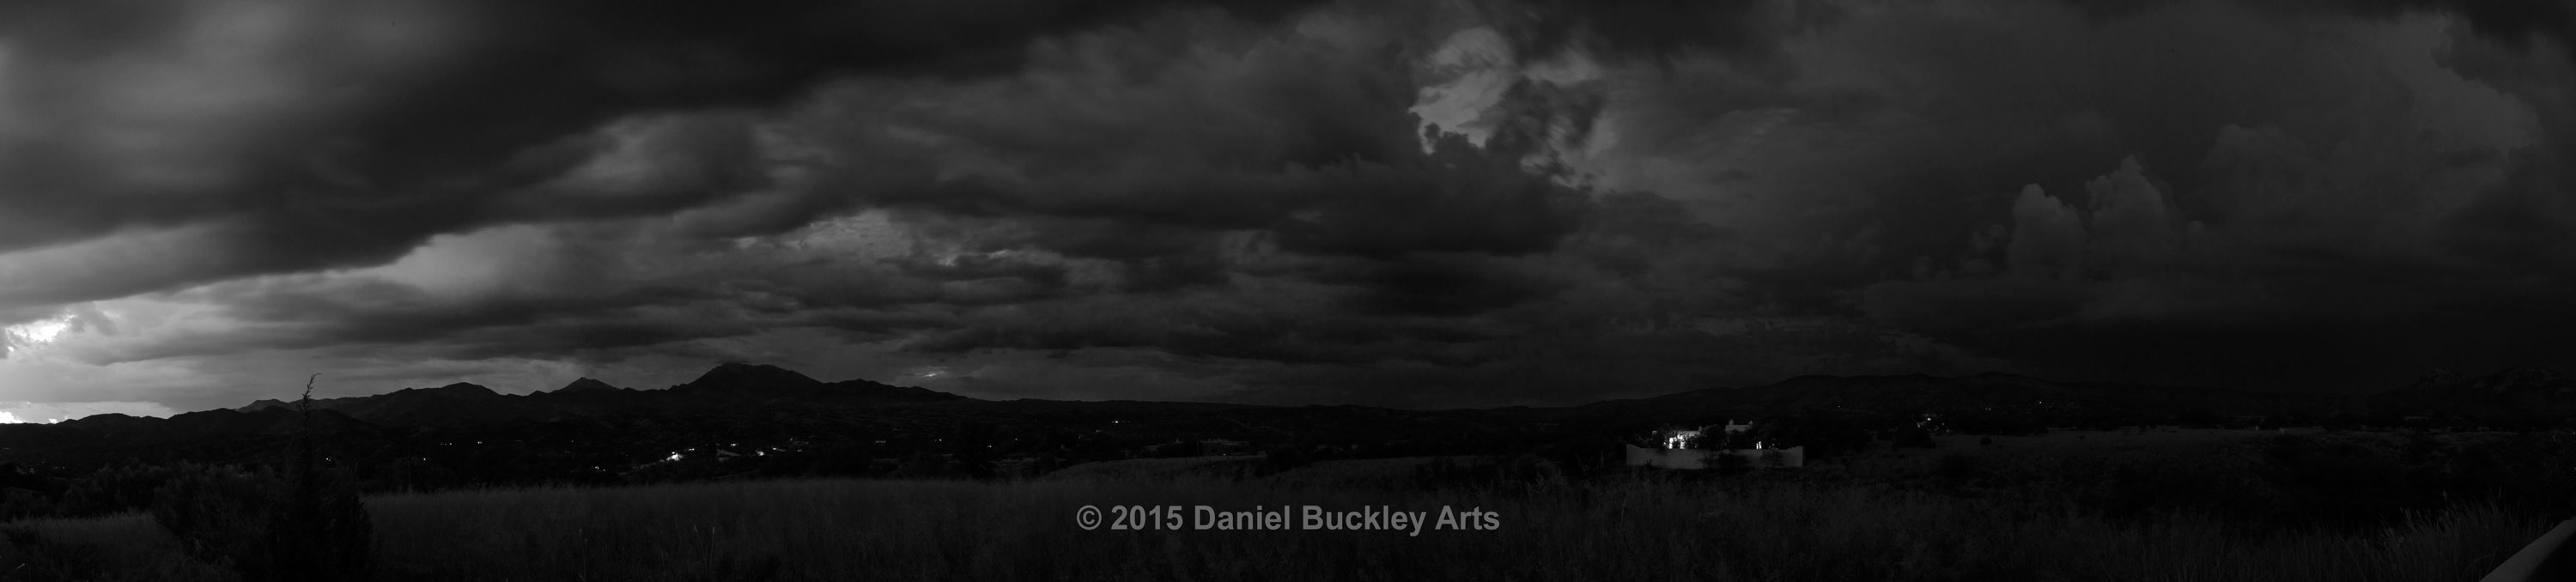
Patagonia looking east, 7:16 p.m. 08/0715
Click image to enlarge:
Even as The Mariachi Miracle rolls along with shooting of interviews, select performances and so on, my various photography series have continued.
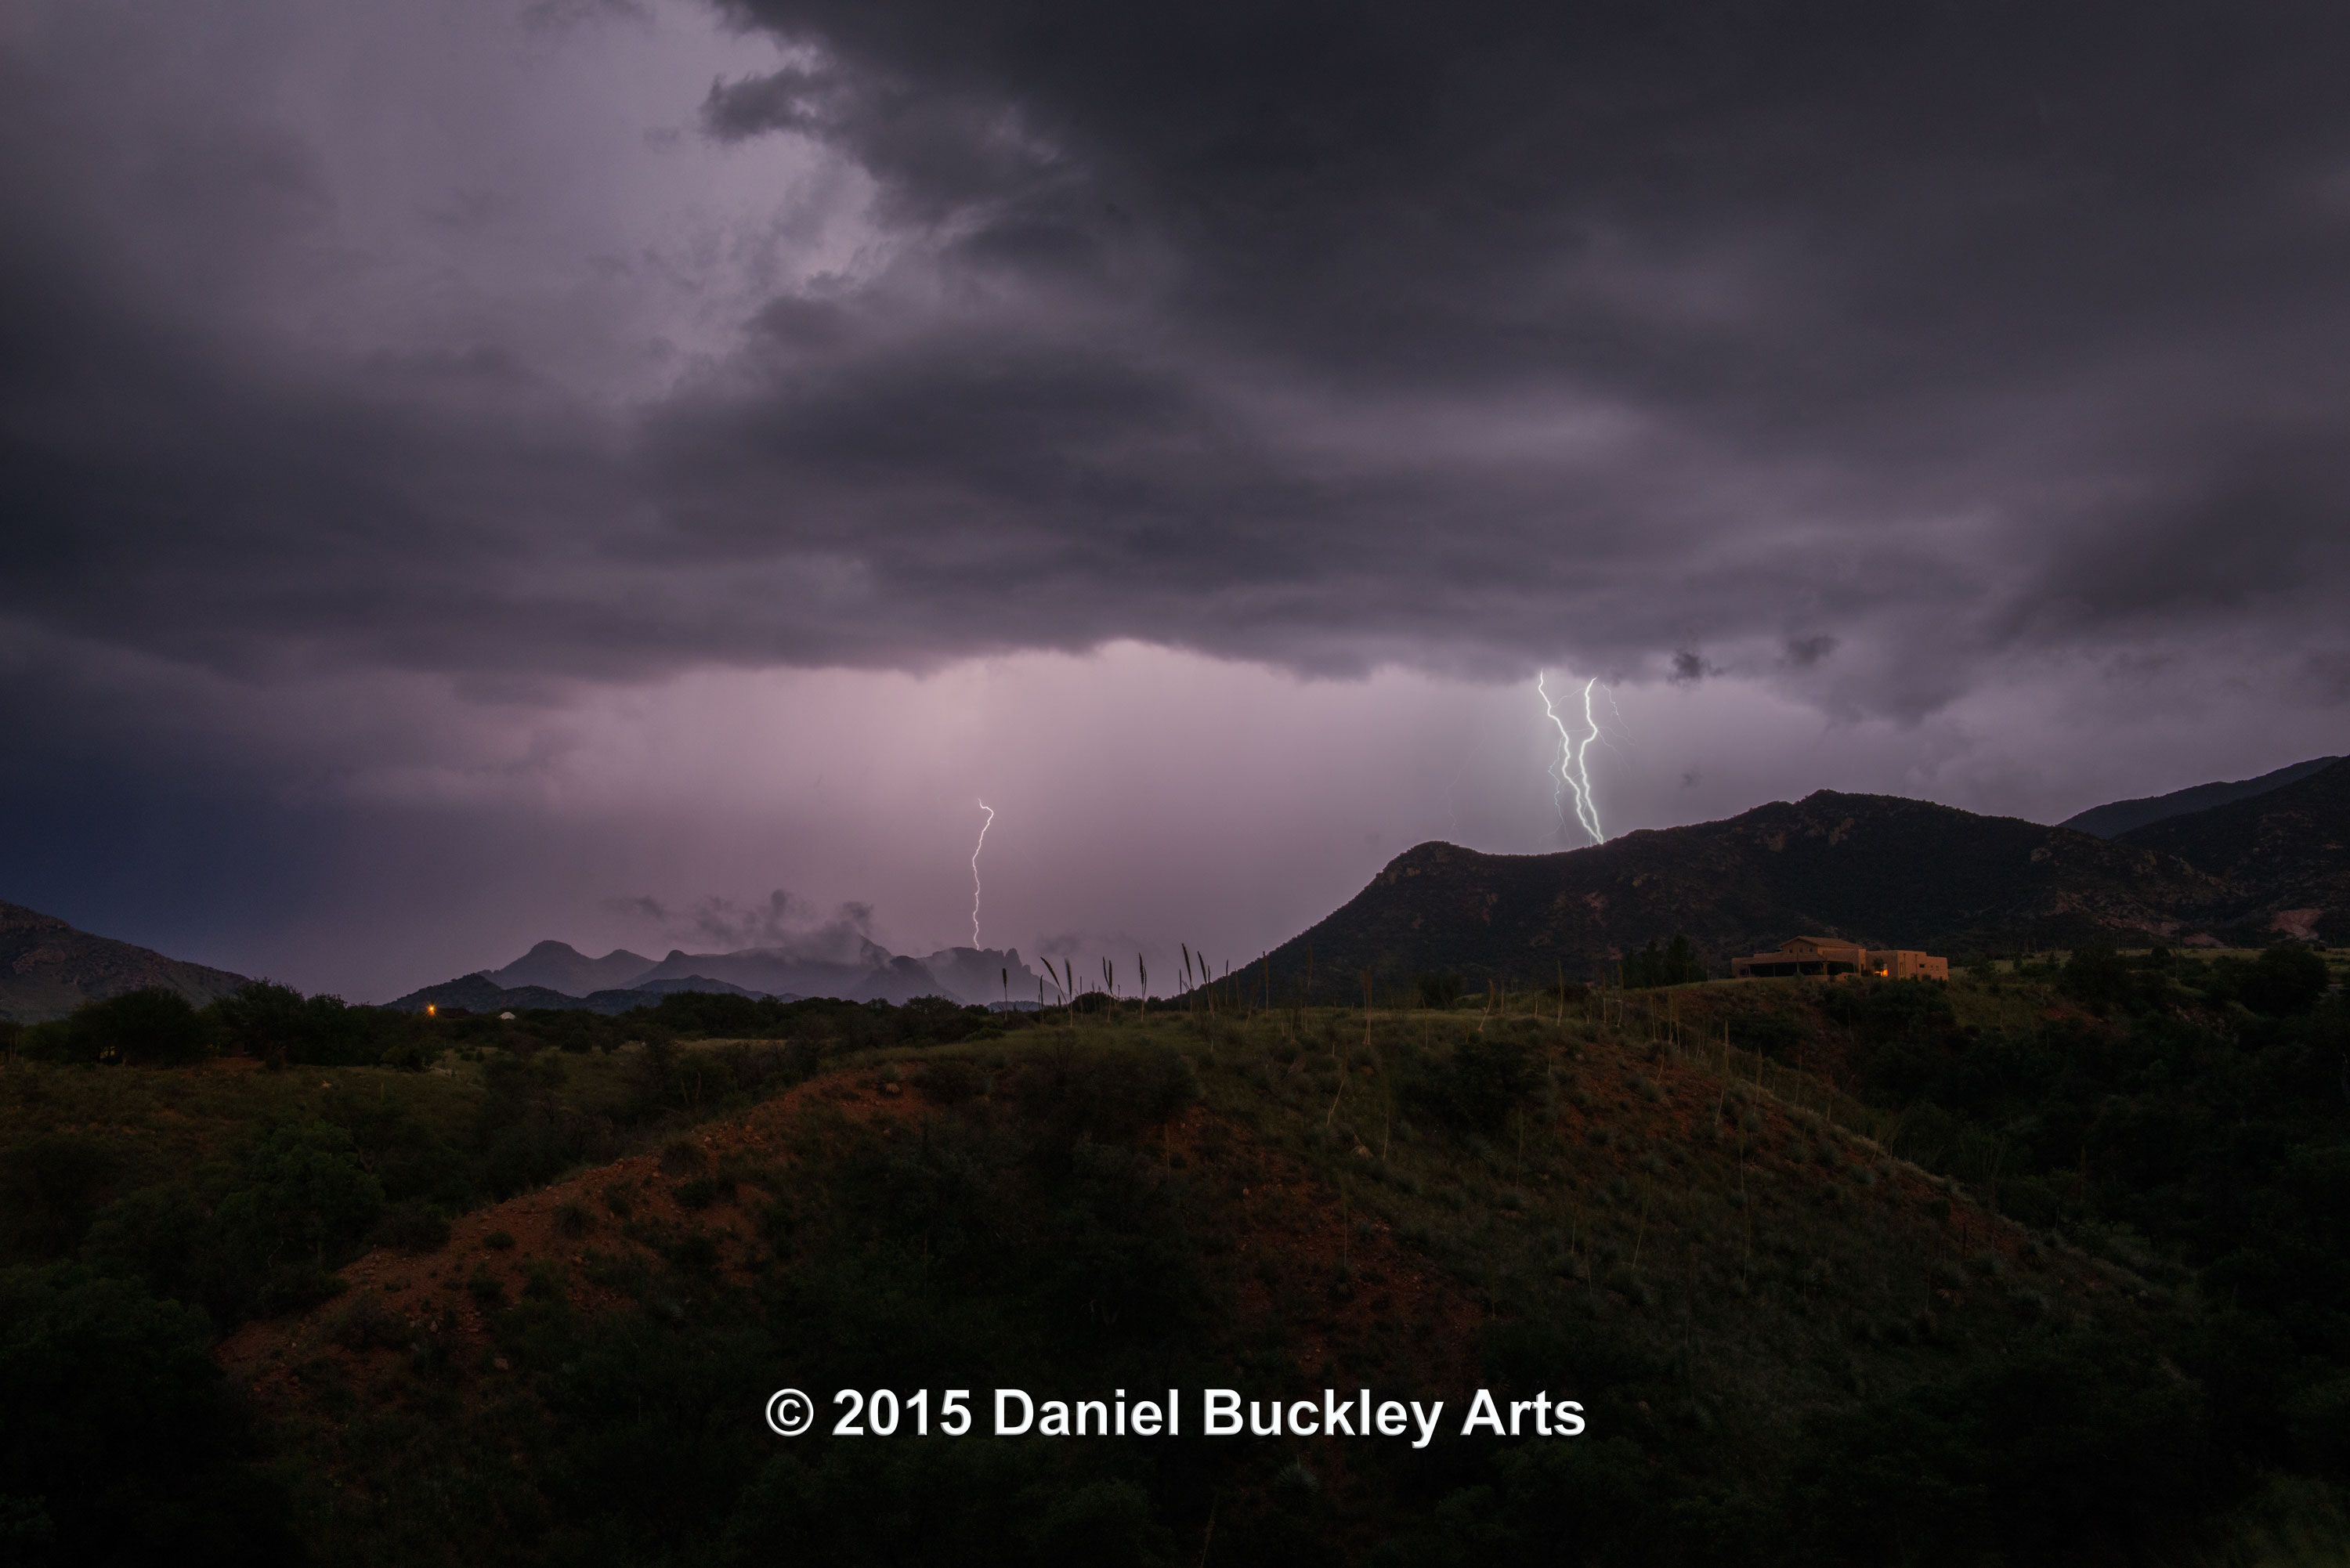
Patagonia lightning 7:44 p.m. 08/07/15
I haven’t gotten a lot of lightning images this summer, but I haven’t really tried either. Typically when the great storms have come I have been occupied with other projects.
But we did have a spectacular fire in the Santa Catalina Mountains and I spent some time trying to work out how to shoot such a beast, with mixed success, naturally.
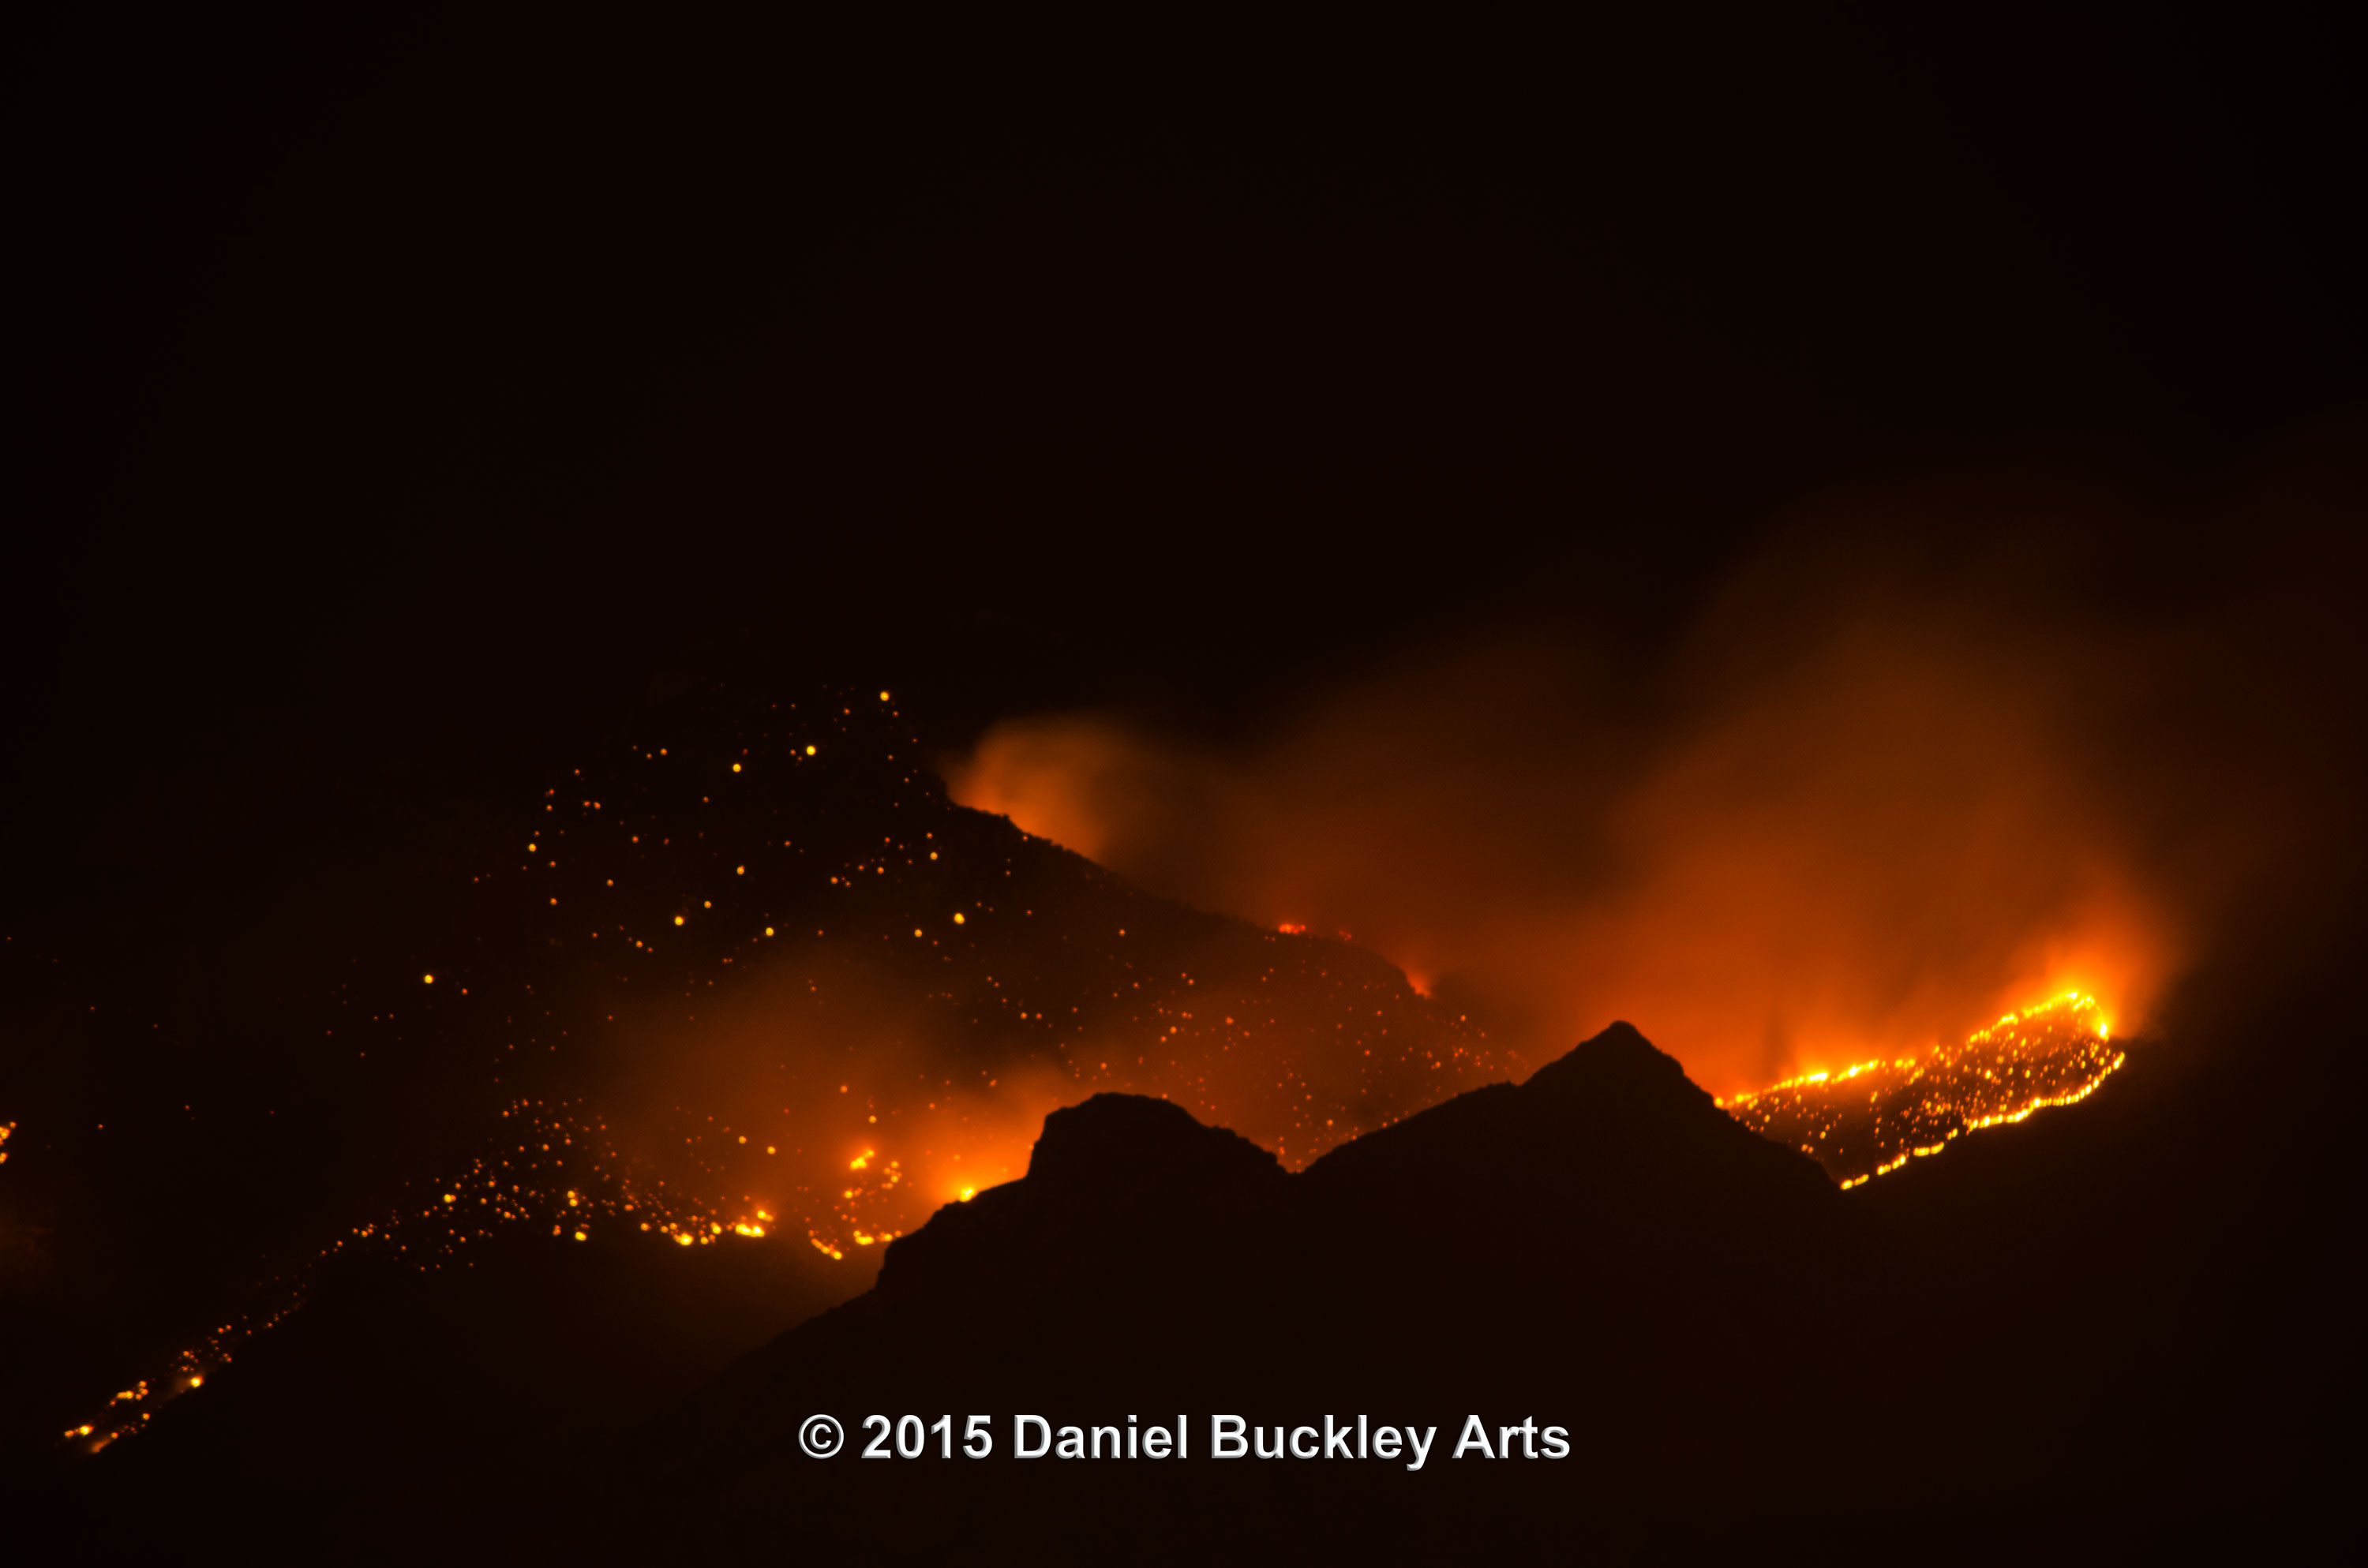
Finger Rock Fire, 10:45 p.m., 08/05/15
In shooting the fire I worked much the way I do landscape work – big blocks of time punctuated by frequent shooting of the same areas, over and over. The work is about process, and fires are very a transformational subject.
Finger Rock Fire 08/06/15 1:15 a.m.
In the first two hour segment, the fire was building rapidly, and the photos are quite spectacular. It looks like the long dormant fault-block Santa Catalina Mountains suddenly sprung a magma leak and turned into volcanoes.
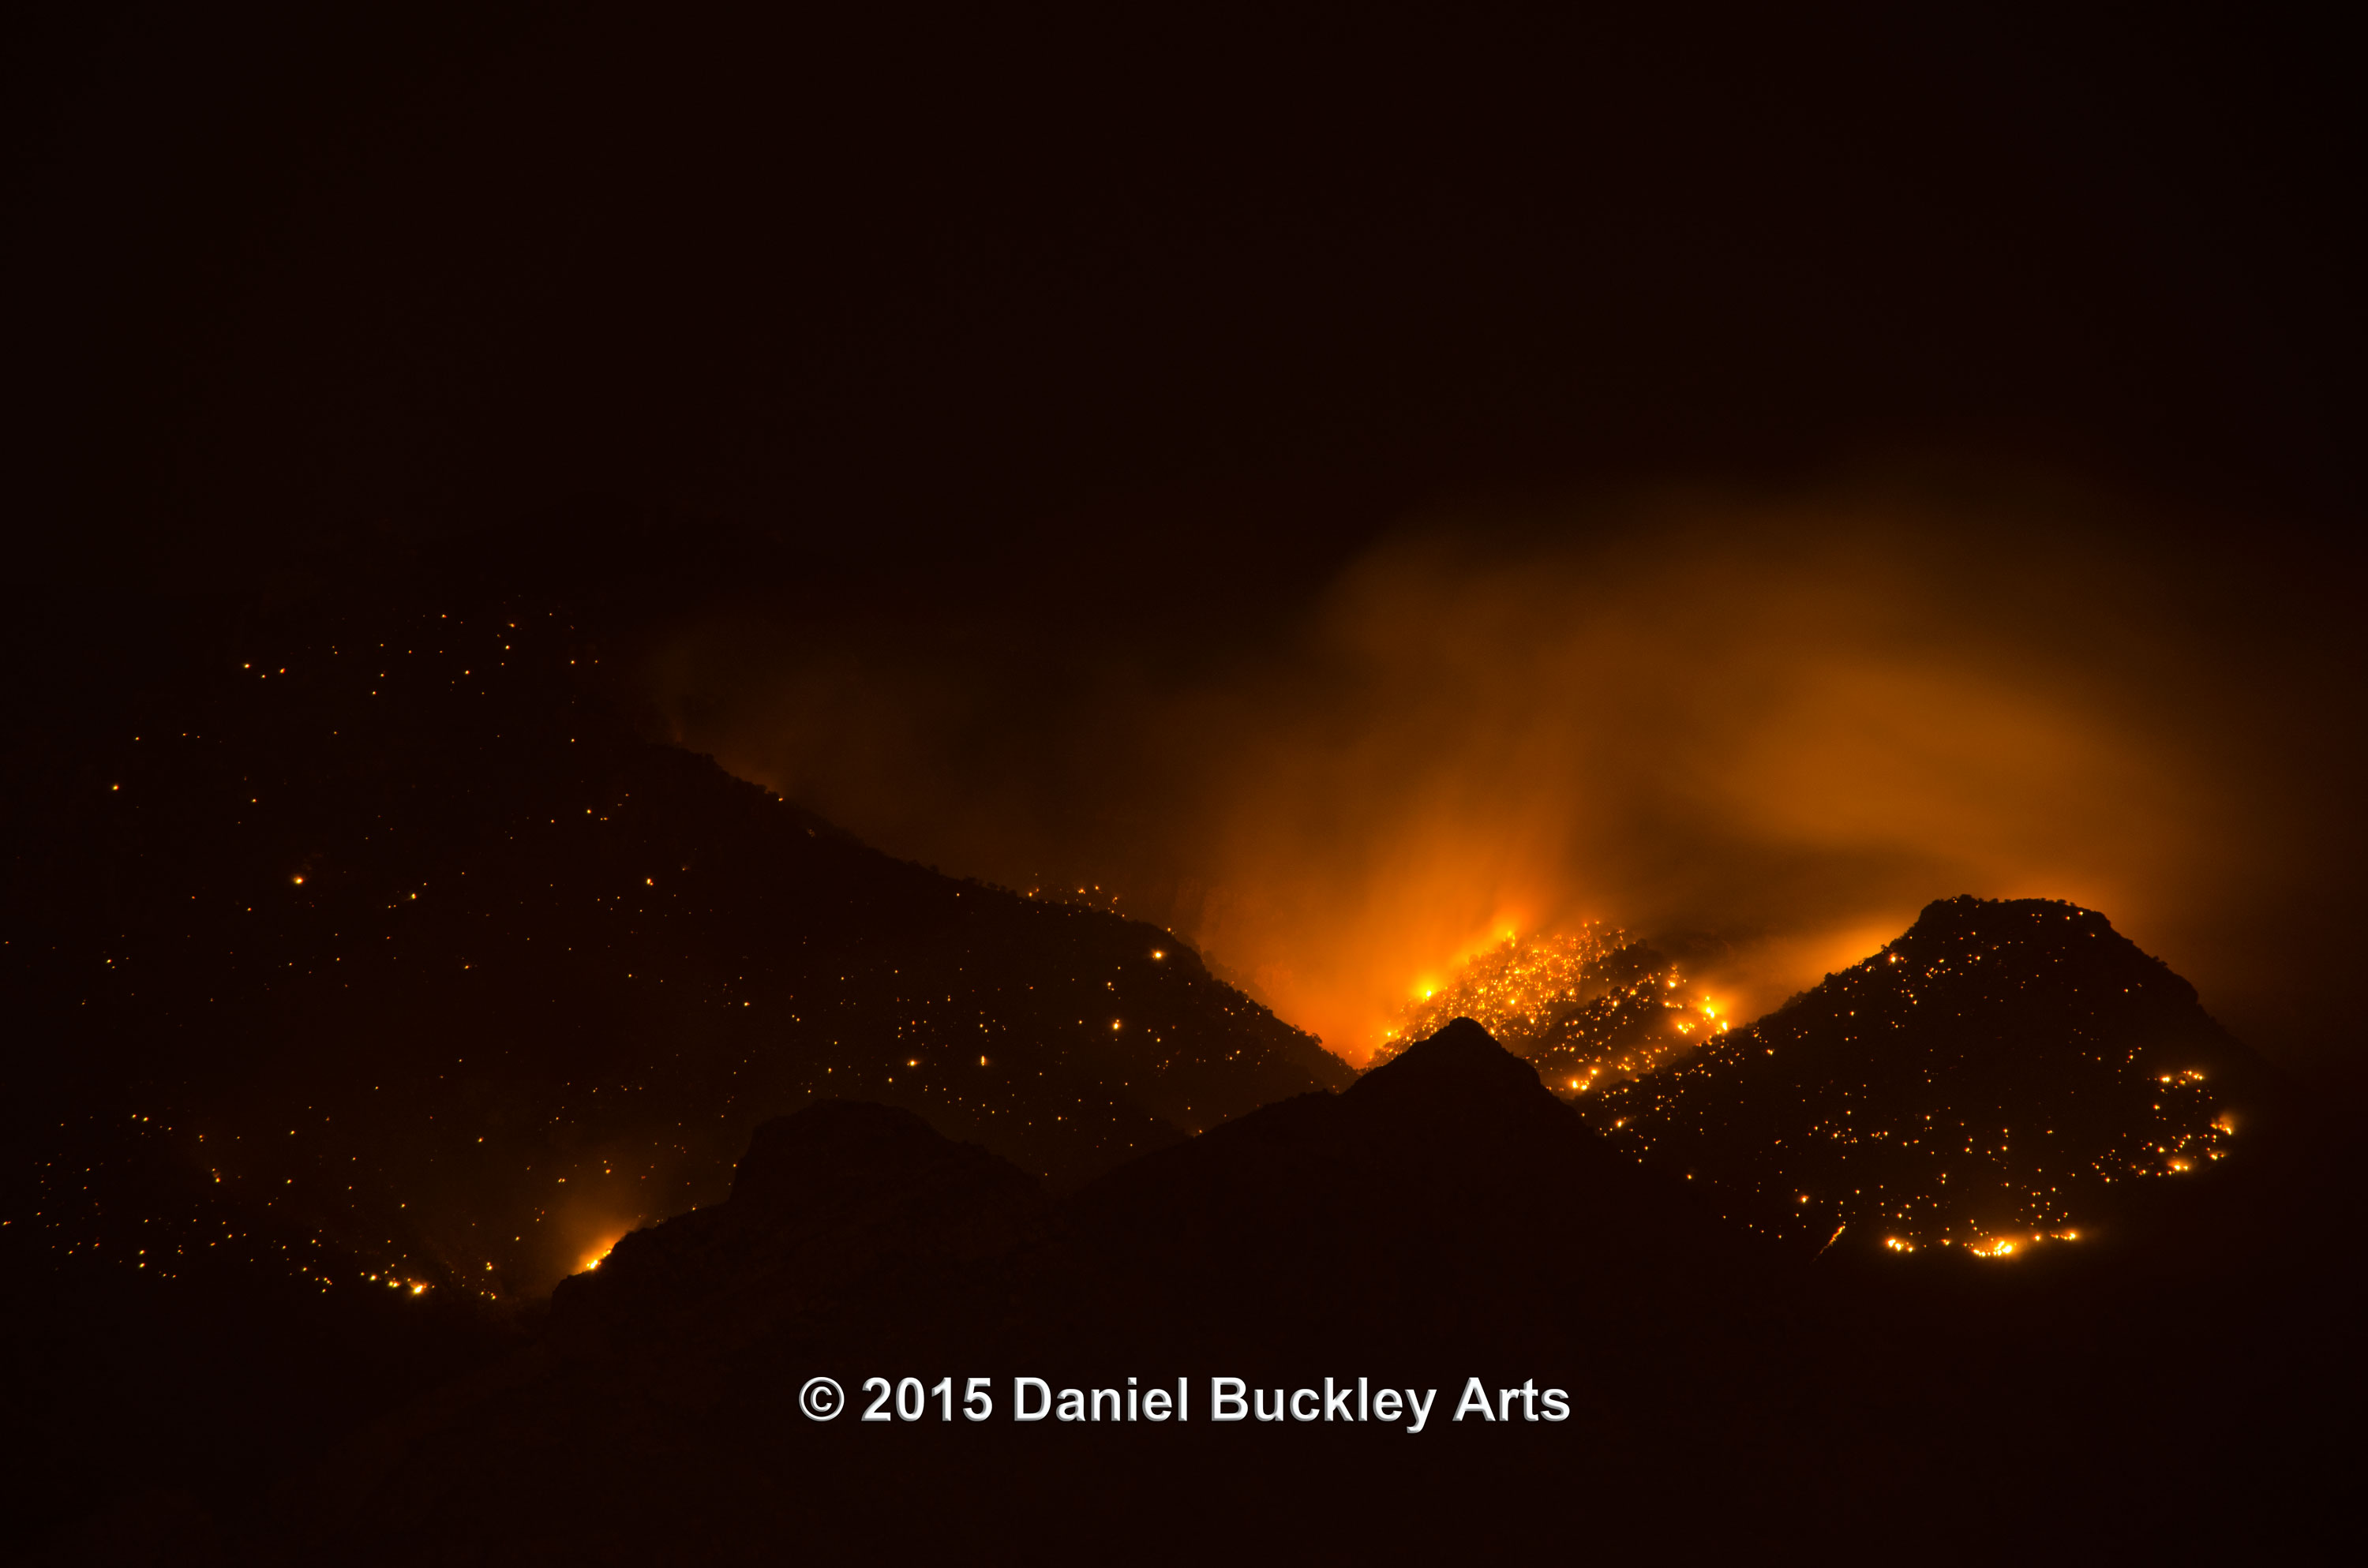
I returned a few hours later, after midnight, and recorded a pulsing phase in which the fire would rhythmically blaze up and calm down.
Finger Rock Fire 08/06/15 9:58 a.m.
By daylight the fire seemed less restless. I photographed isolated curtains of smoke. The rains a couple days later extinguished the blaze.
Patagonia 08/07/15 2:58 p.m.
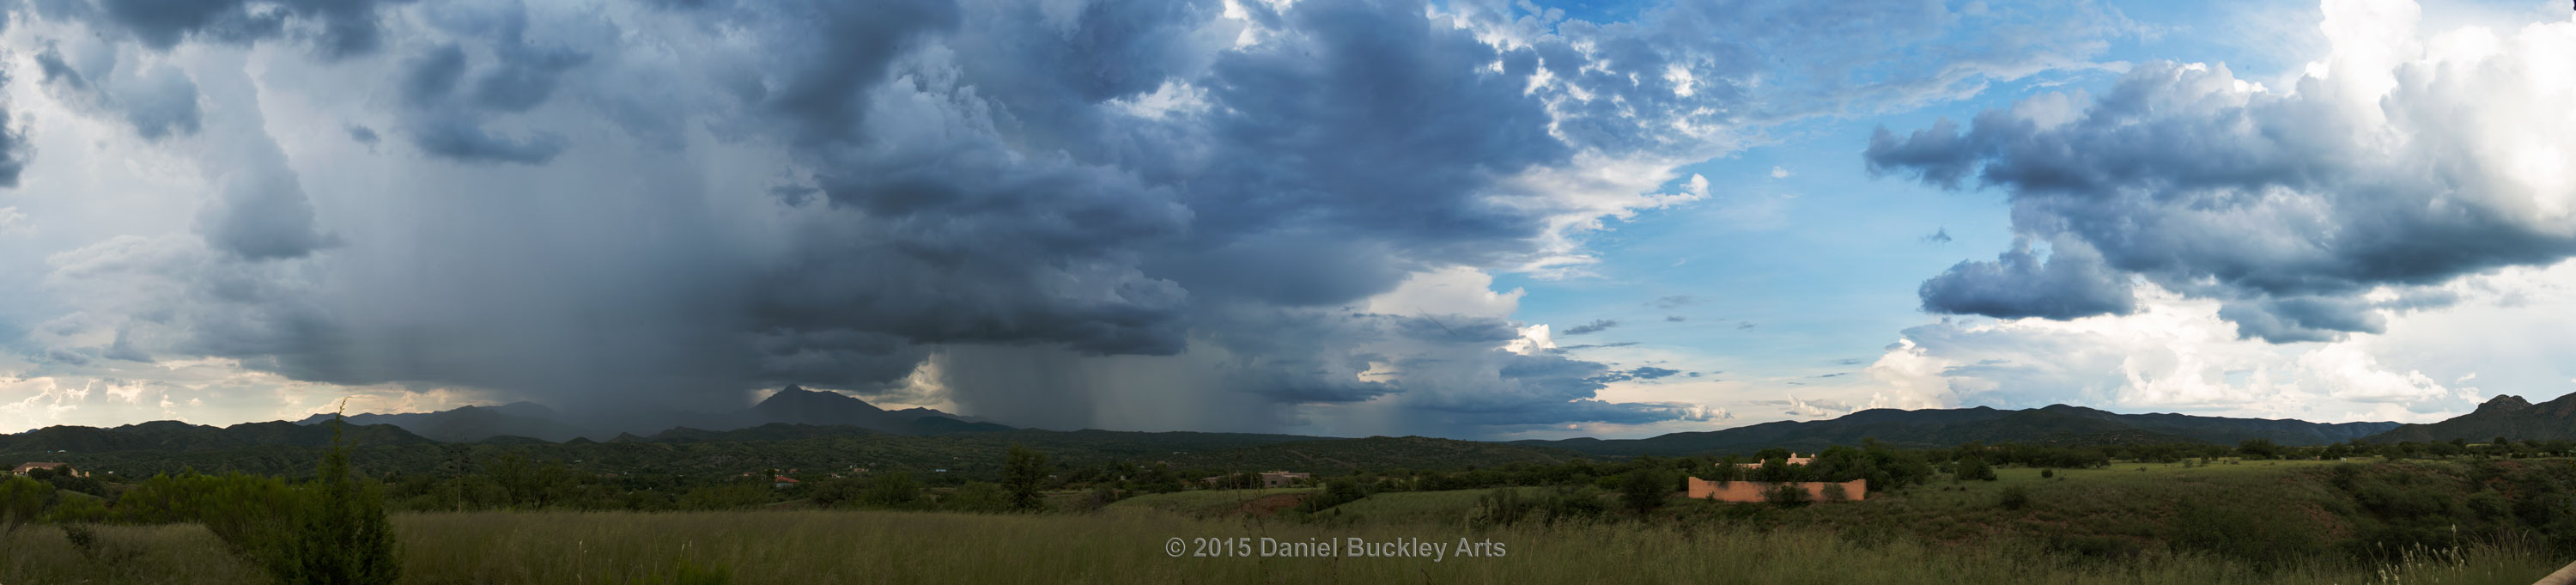
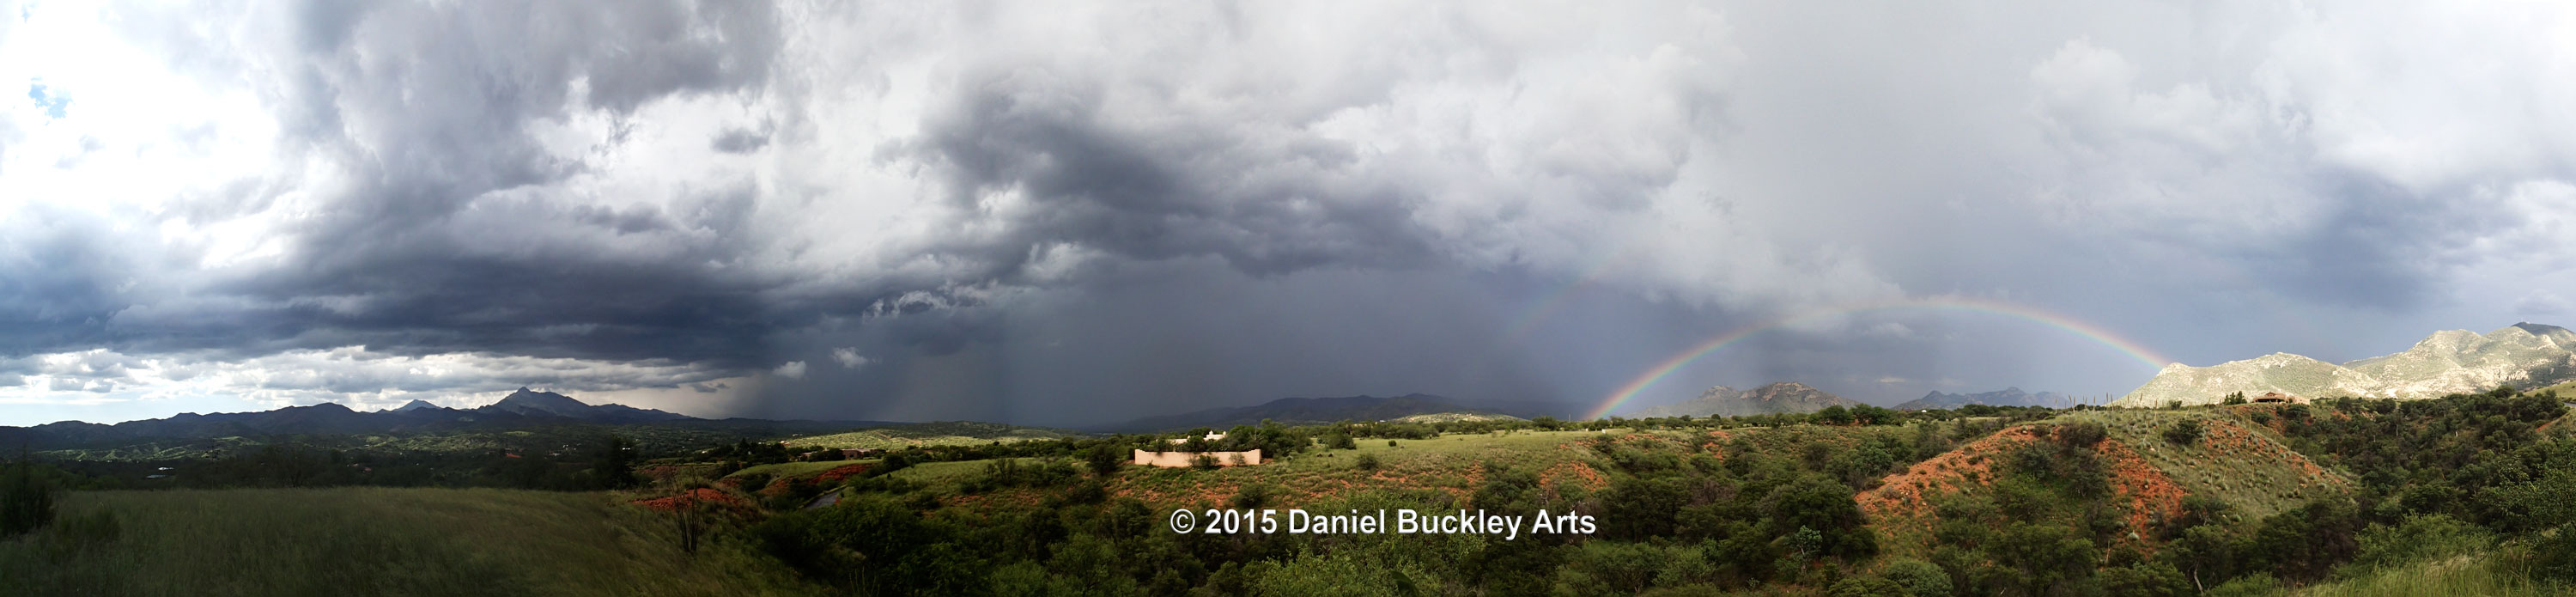
On August 7 I traveled to Patagonia, Arizona to shoot developing storms from the front porch of Adrienne Halpert – longtime friend and owner of Patagonia’s Globals Arts Gallery. An artist herself, Halpert had her home and studio built on a spectacular piece of land overlooking most of the town and with a stellar view of the surrounding mountains in multiple directions.

Patagonia 08/07/15
3:43 p.m.
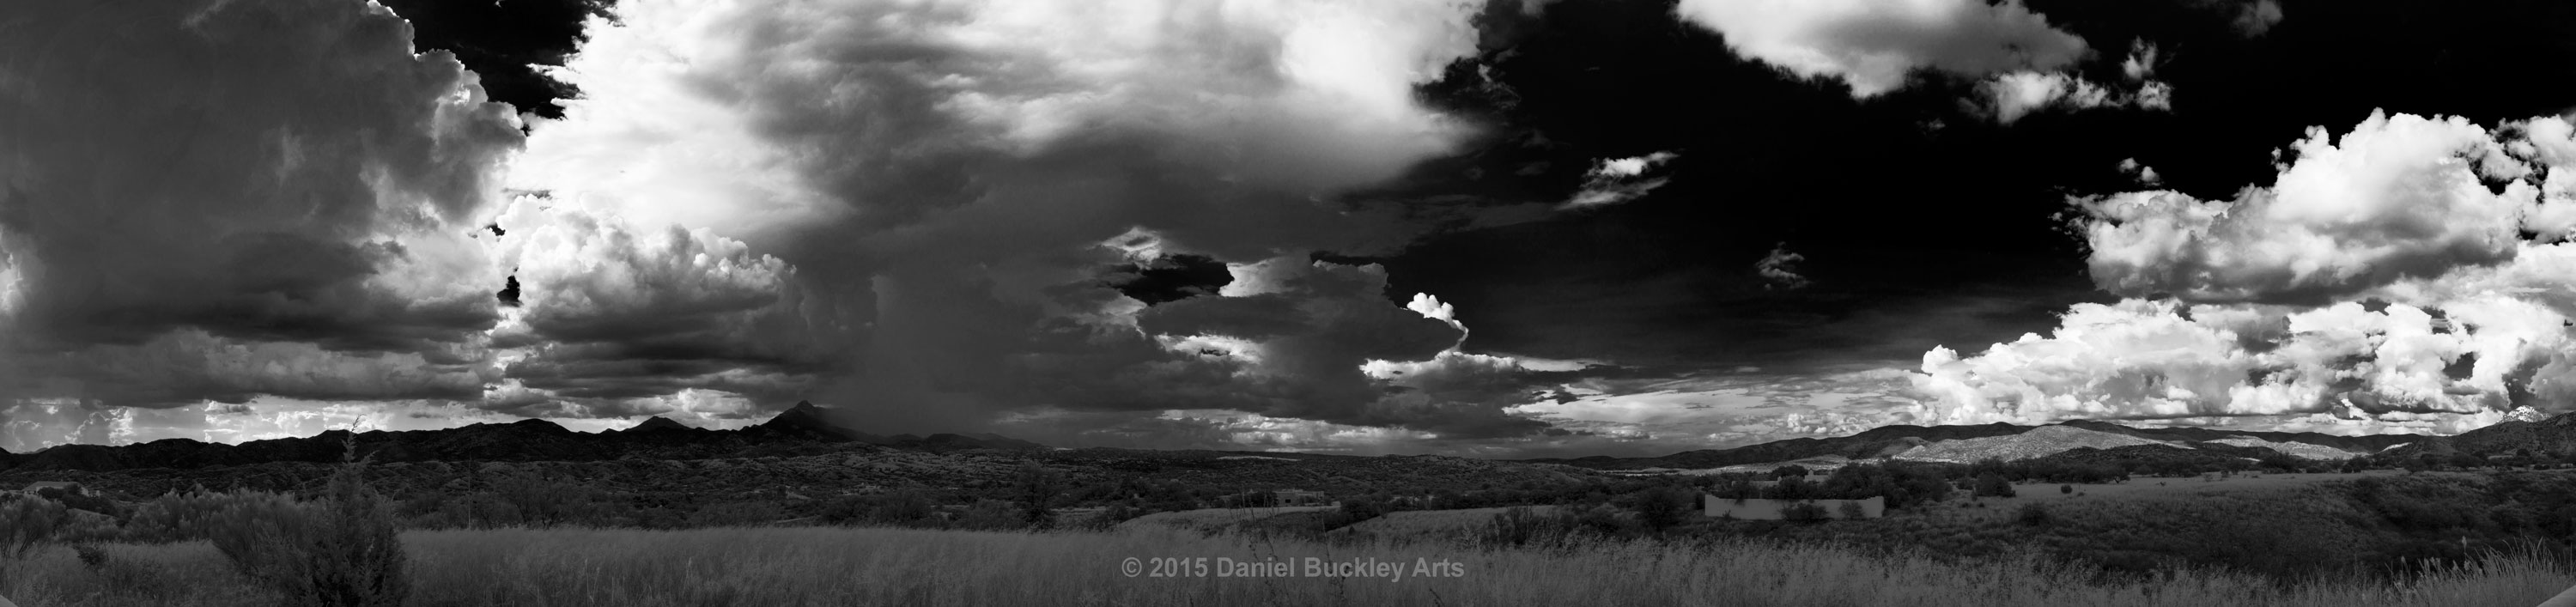
I brought several cameras – a wide-view full frame SLR to shoot the main panoramas of what was transpiring to the north, a broadcast quality video camera to shoot cloud transformations over the Santa Rita mountains, a telephoto-equipped SLR to shoot details and capture panoramas on the eastern horizon (this was the only camera not tripod-mounted) and a GoPro camera shooting video in 4k on the east side.
I spent more of the day shooting periodic panoramic shots with the full frame camera, running around in between with the telephoto camera to make other observations. From time to time I would check the two video cameras as well.
Patagonia 4:11 p.m.
The heat was a bit much for the GoPro camera and it shut itself down often. I would restart it from time to time, but its role was more of a contingency player in the larger scheme of things. The panoramas and the time lapse broadcast video were the main objectives.
Patagonia 4:36 p.m.
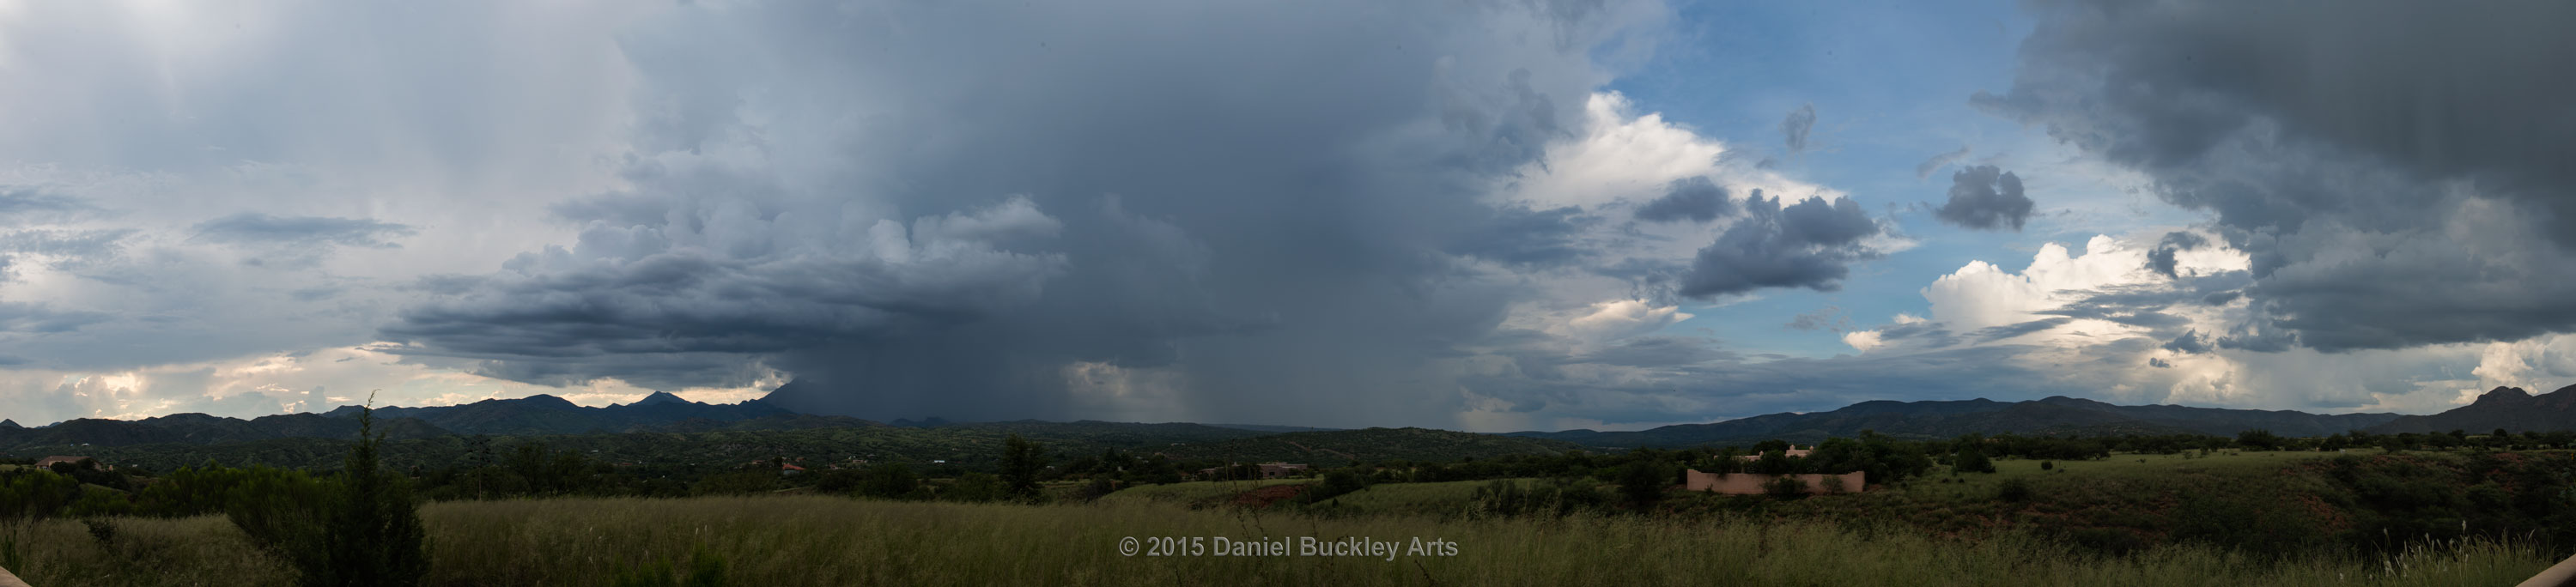
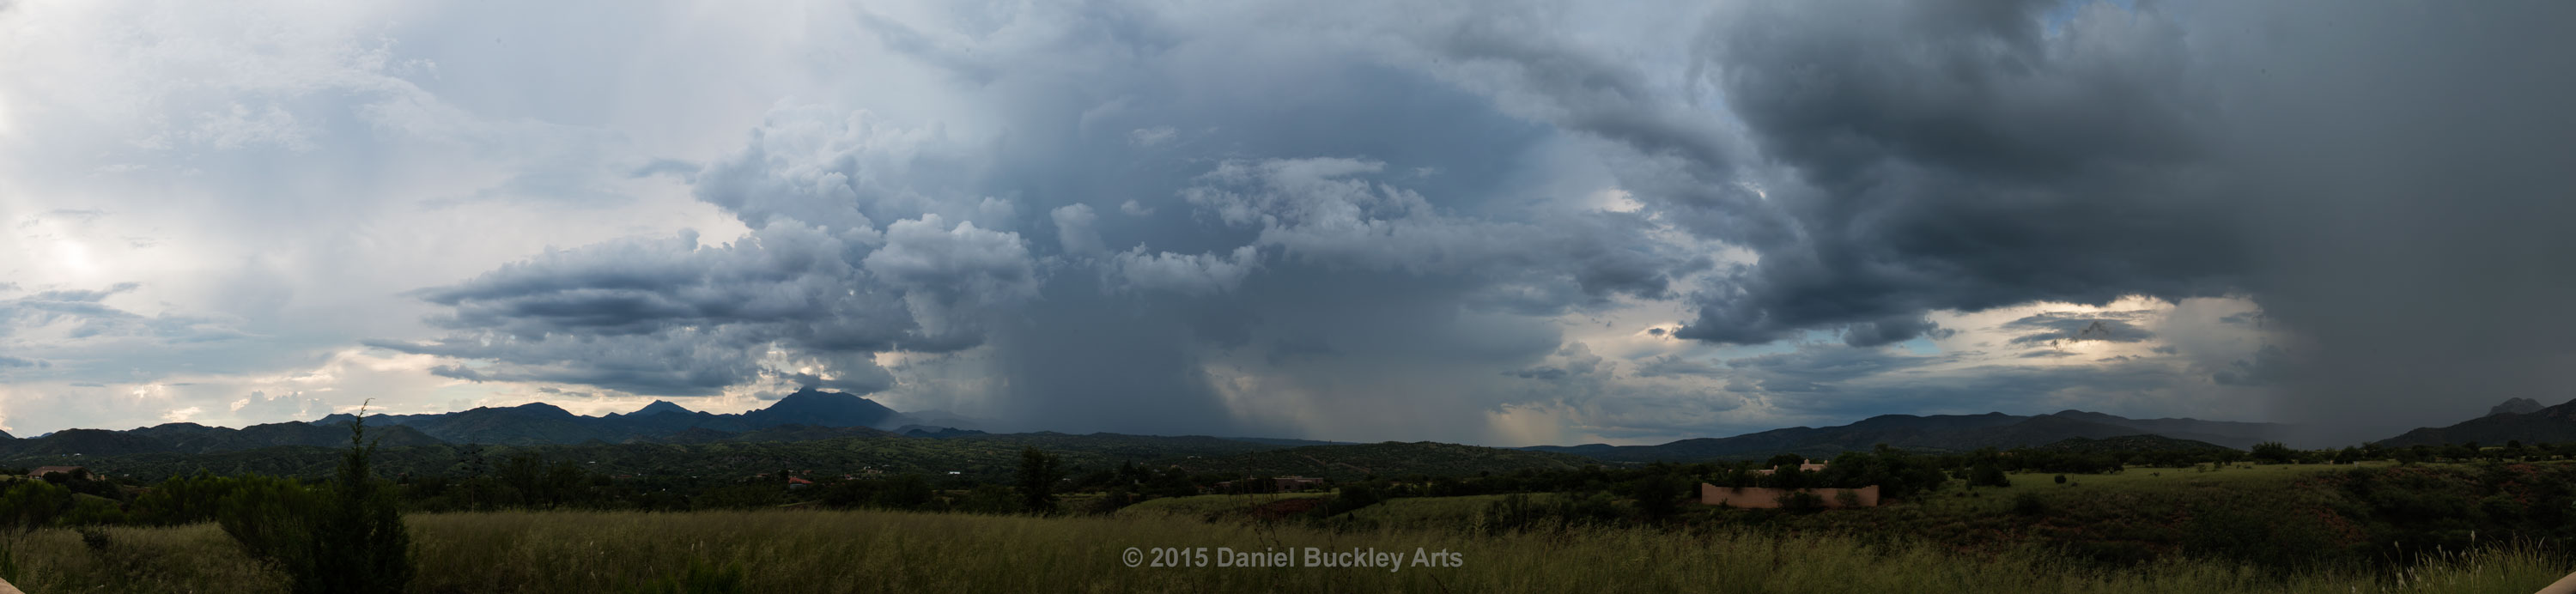
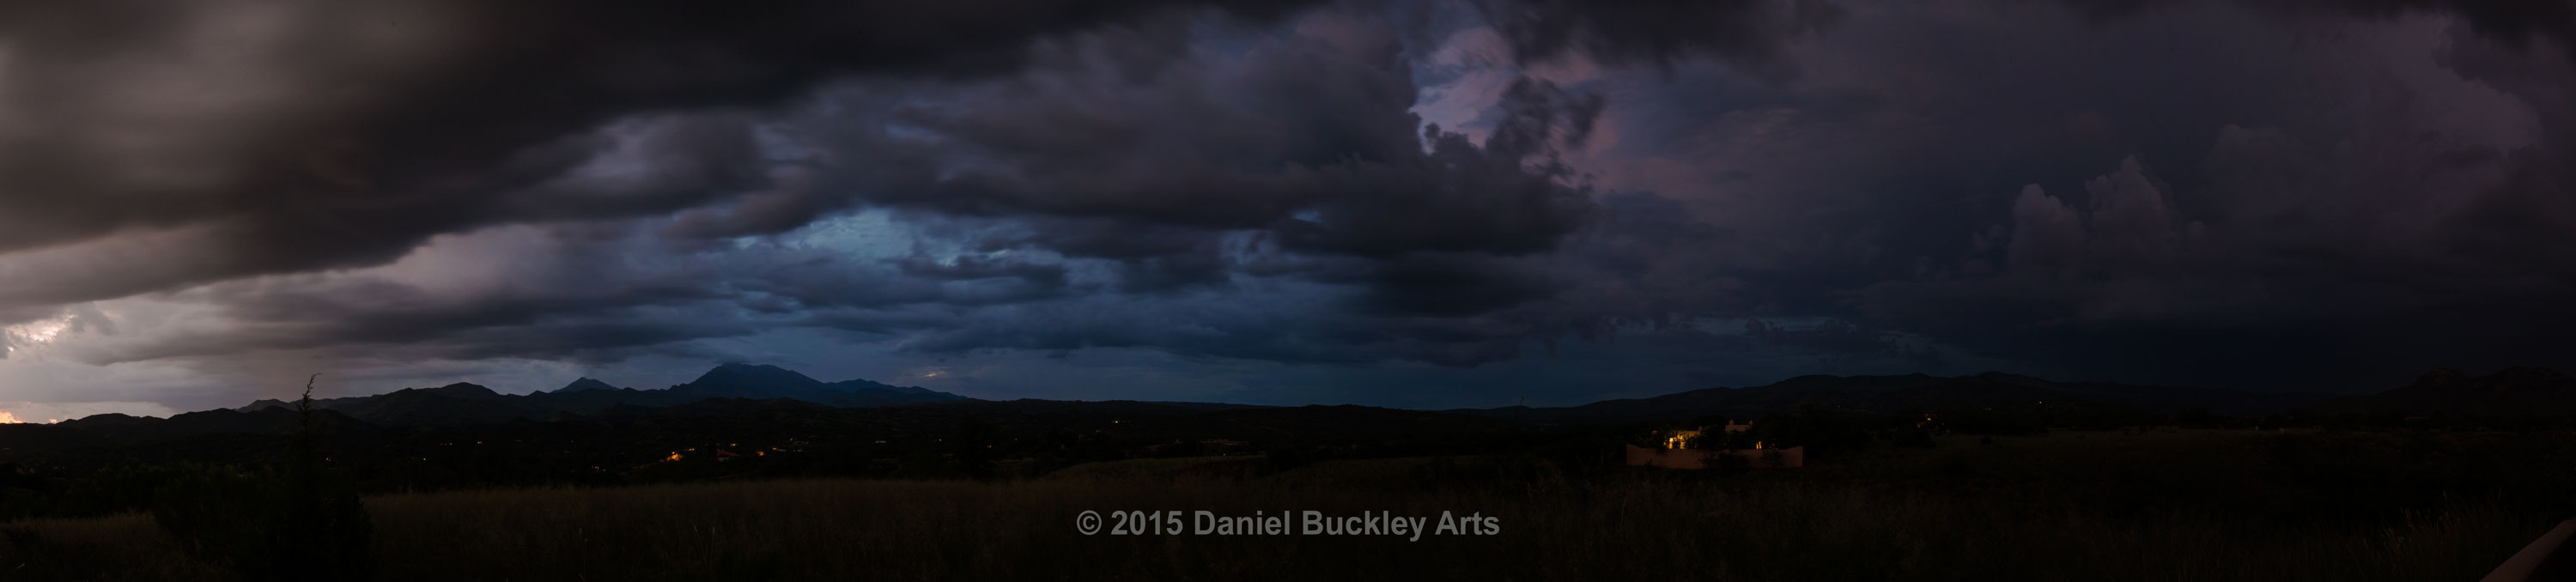
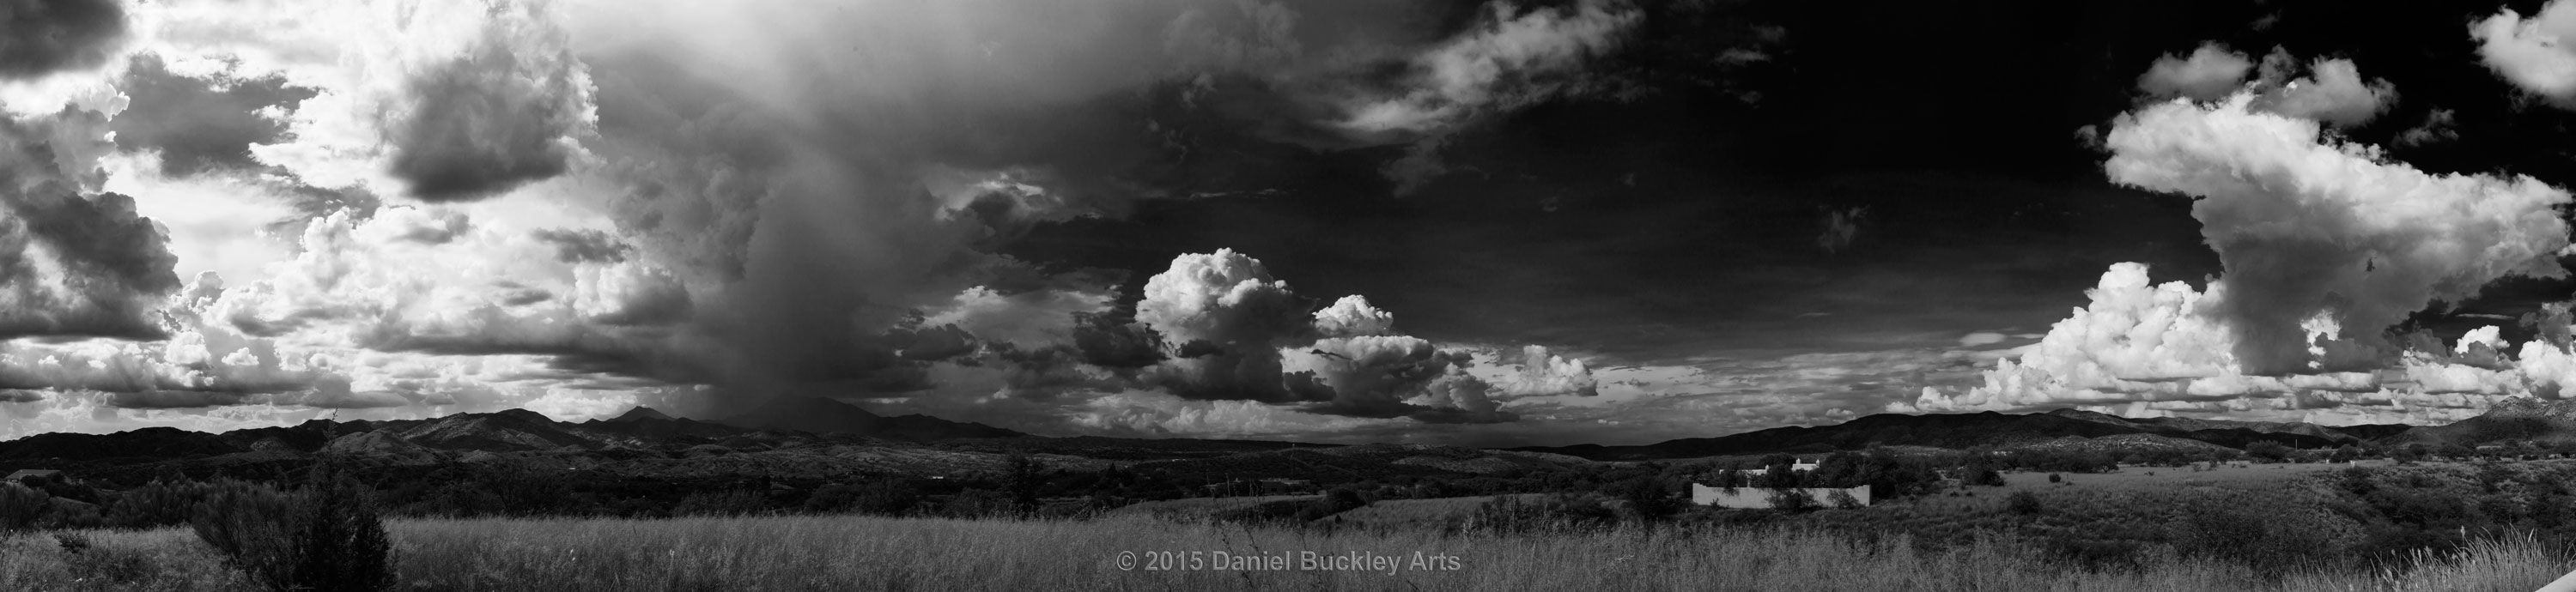
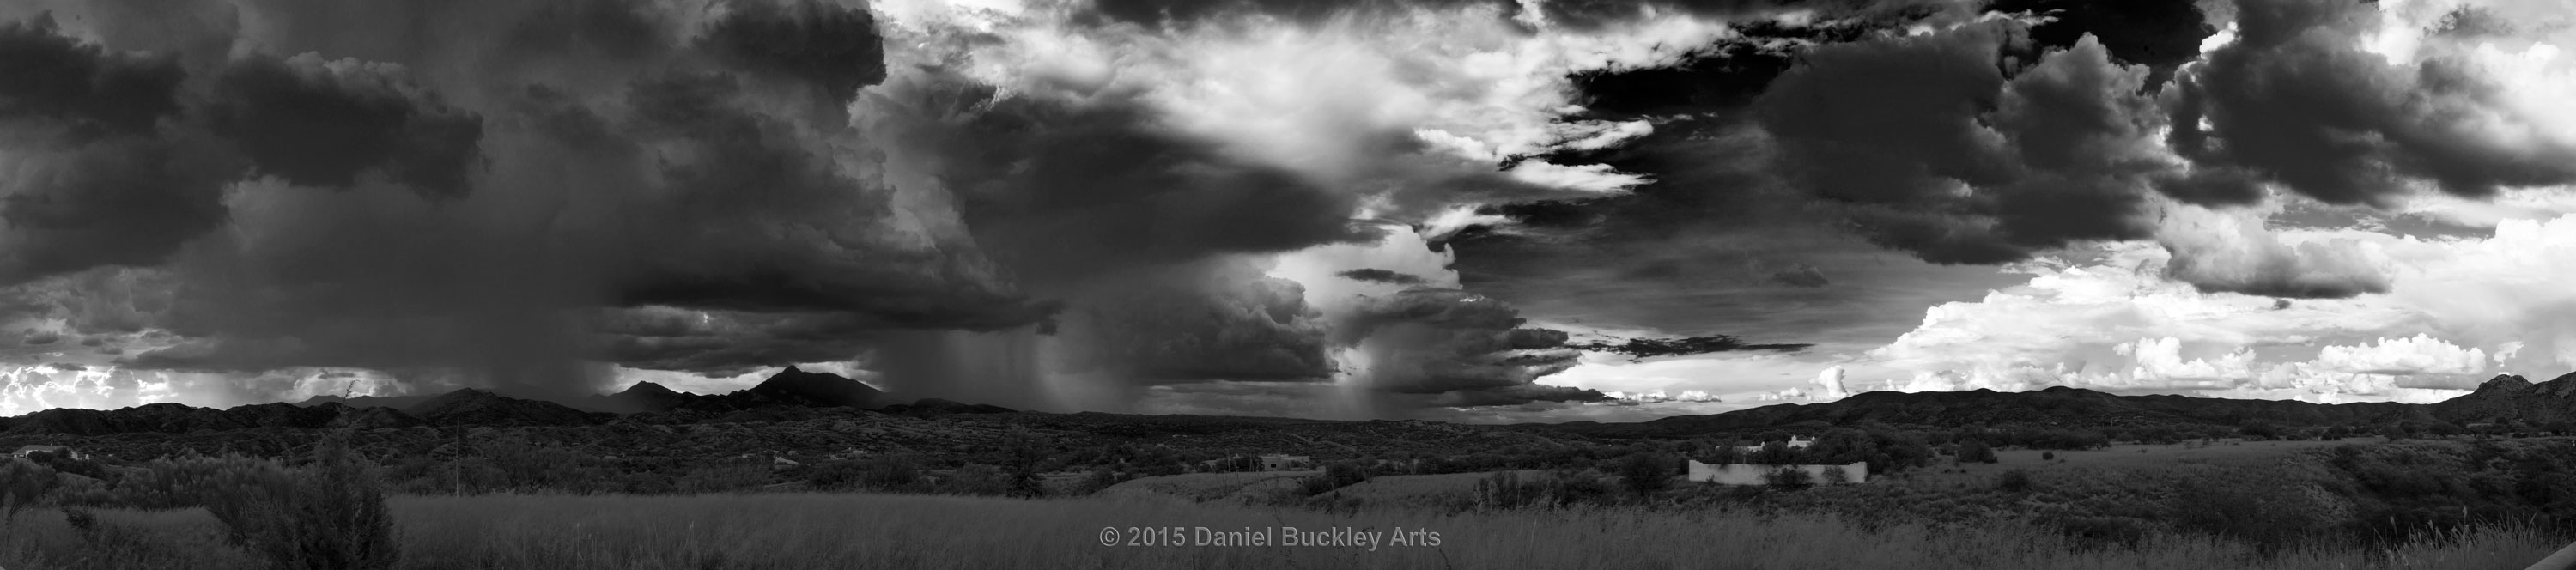
From roughly 2:30 to 7:30 p.m. I kept the cameras rolling, stopping sporadically when Adrienne returned from work to visit, help her with a few chores and have dinner. But over the course of the day, serious storms blew in one after the next, gratefully close enough to be easily picked up by the cameras but far enough away to keep the equipment dry. The sky was spectacularly transformational. And the succession of panorama cells captured the evolving sky.
Patagonia 5:02 p.m.
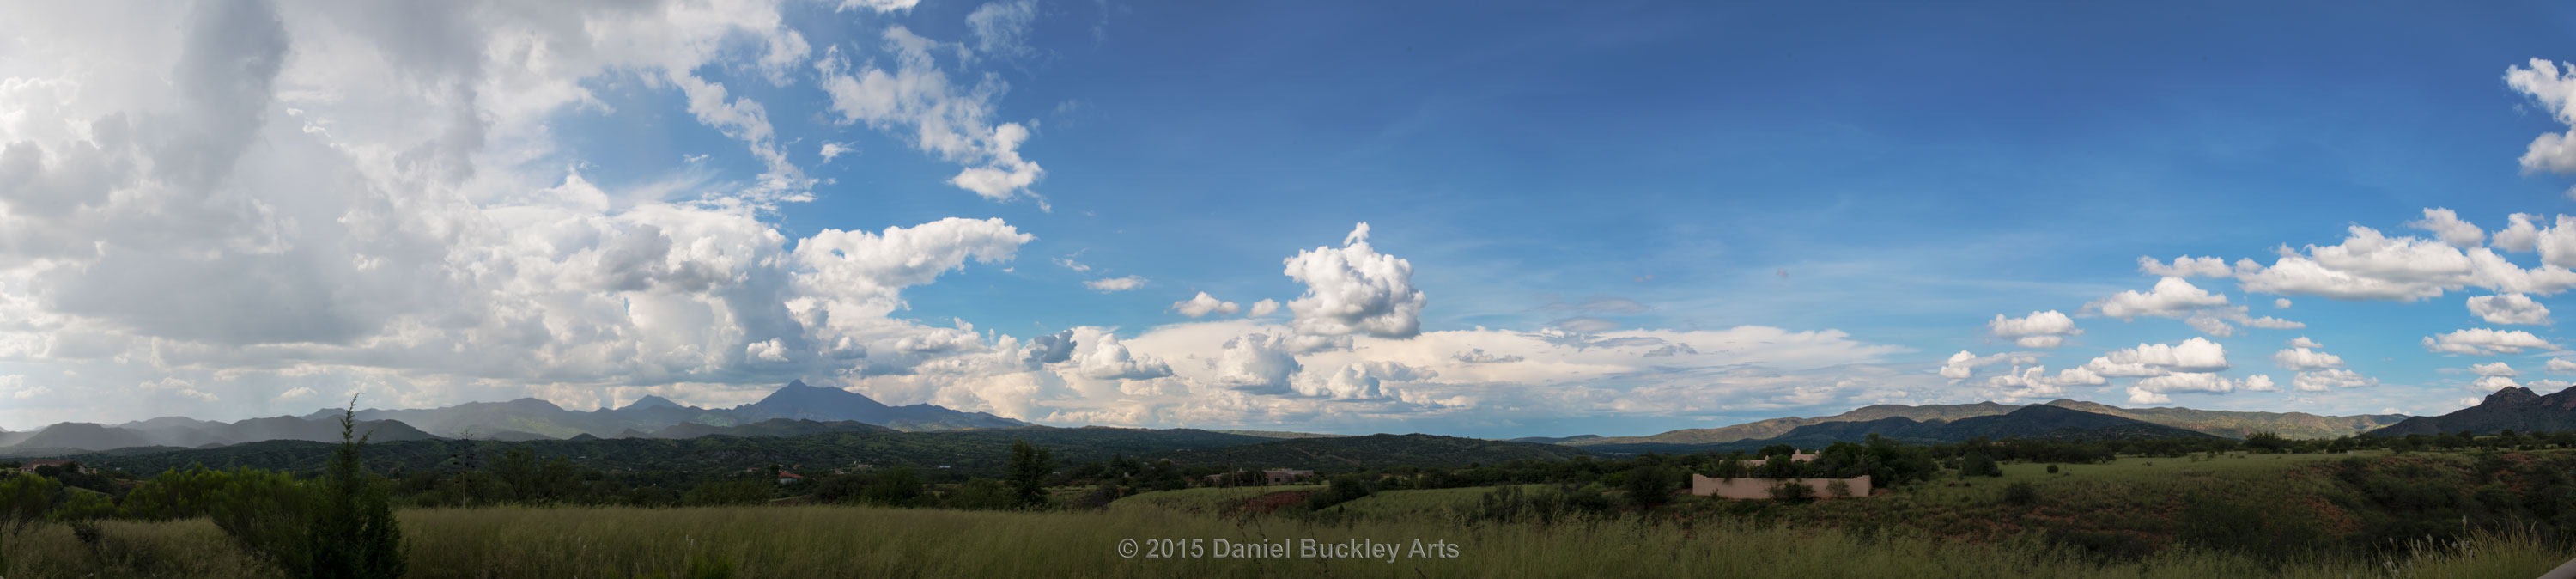
I say “panorama cells” because the SLR involved in shooting them doesn’t have a panoramic mode, nor would I use one if it did. The object is always to create huge, detailed panoramas, And the only way to do that is to shoot each frame, left to right, in quick succession to capture a horizon to horizon view, then stich them together later electronically using Photoshop.
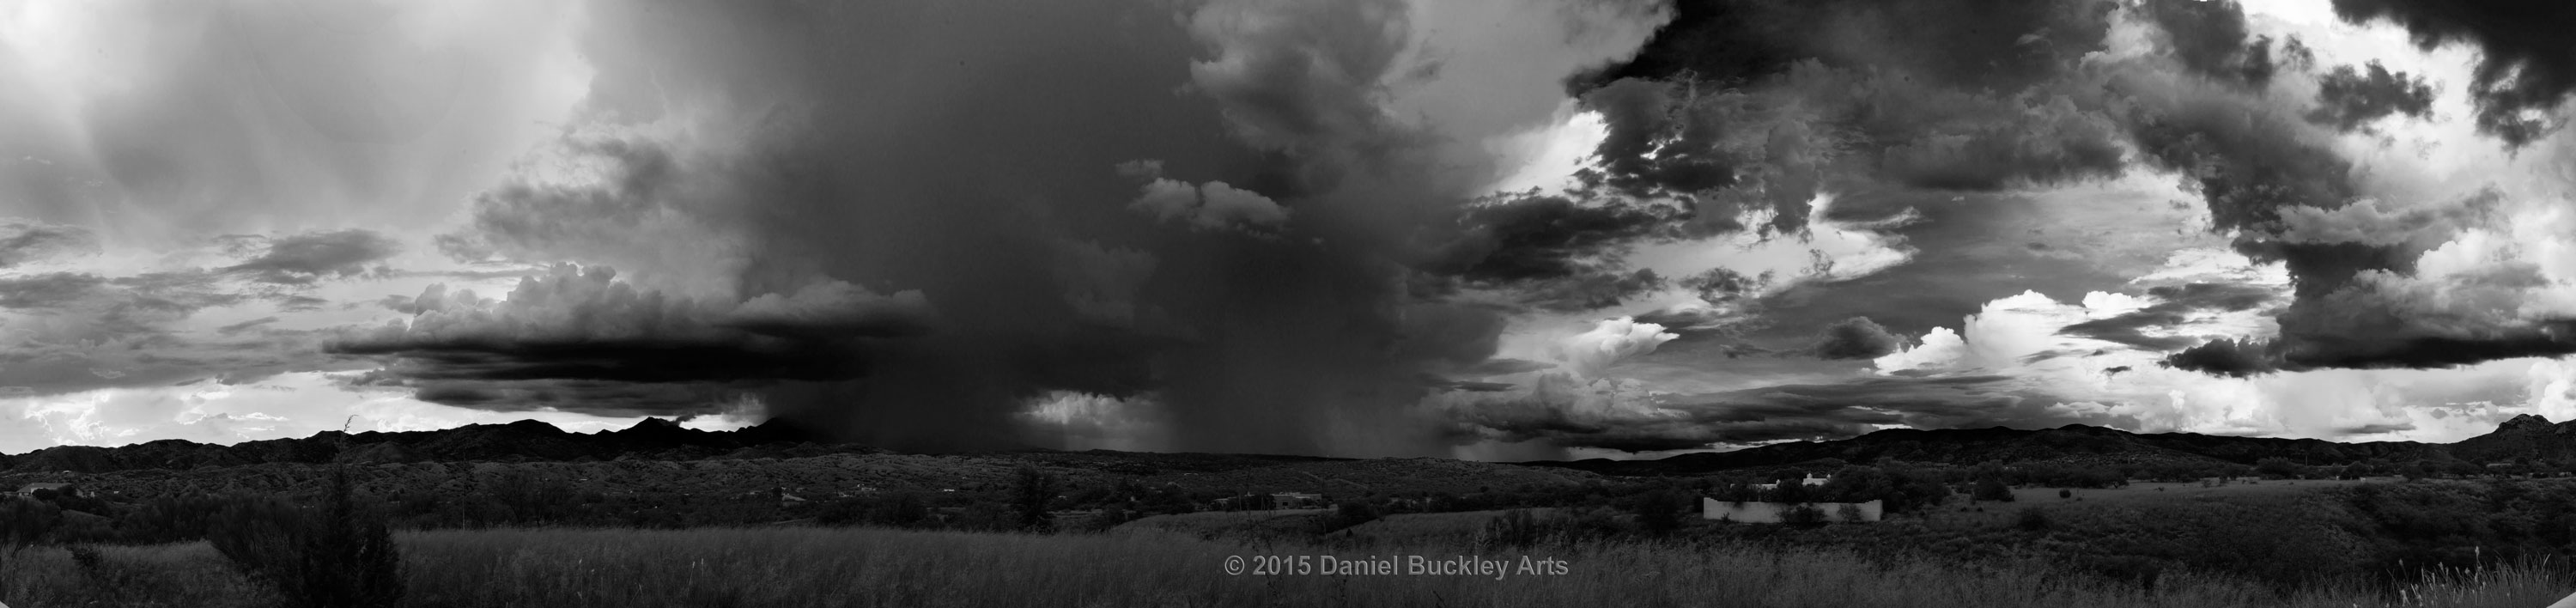
Patagonia 5:20 p.m.
There are limitations, even within that technique. A Photoshop image is currently limited to around 8200 pixels in any direction, which yields a pretty healthy composite with a lot of detail but still “throws away” a huge amount of content. Nothing, of course, is actually thrown away. I keep and back up all of the Camera Raw images used to assemble the panoramas.
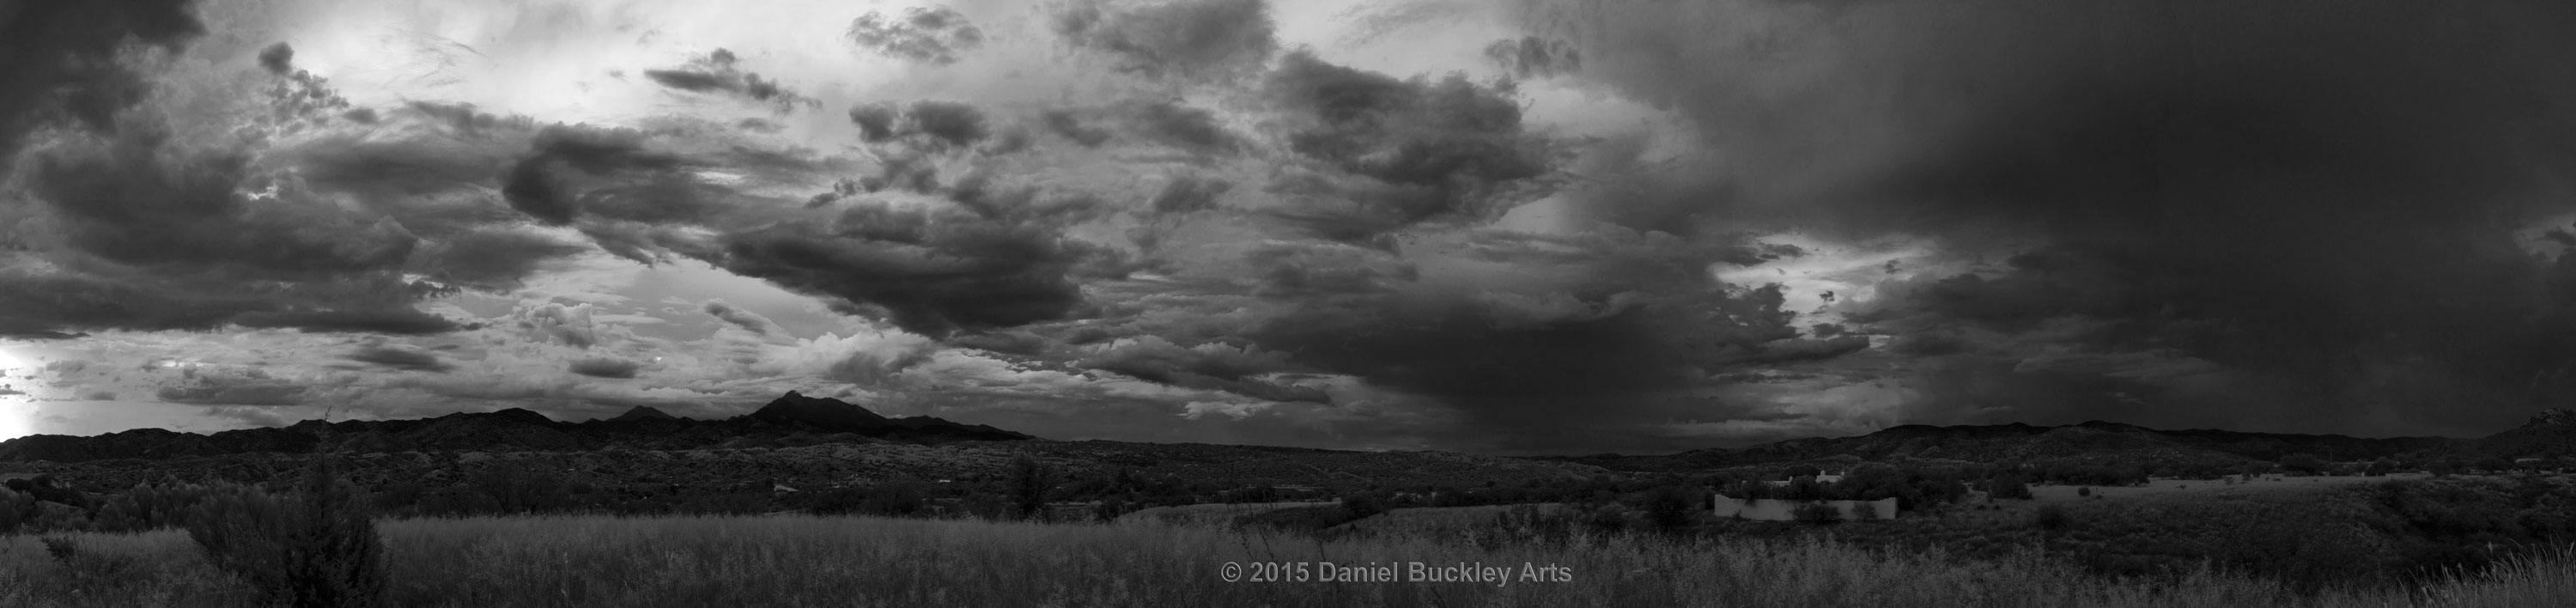
Patagonia 5:53 p.m.
Over time I have developed a particular nomenclature that helps me reference the original source material. The first word in the title is the place it was shot of subject matter. This is followed by the date as a series of six numbers. Thus August 7, 2015 becomes 080715. Next is the four digit camera sequence number of the leftmost cell in the composite. And connected to it is a 2 digit number indicating how many frames were used to create the total panorama.
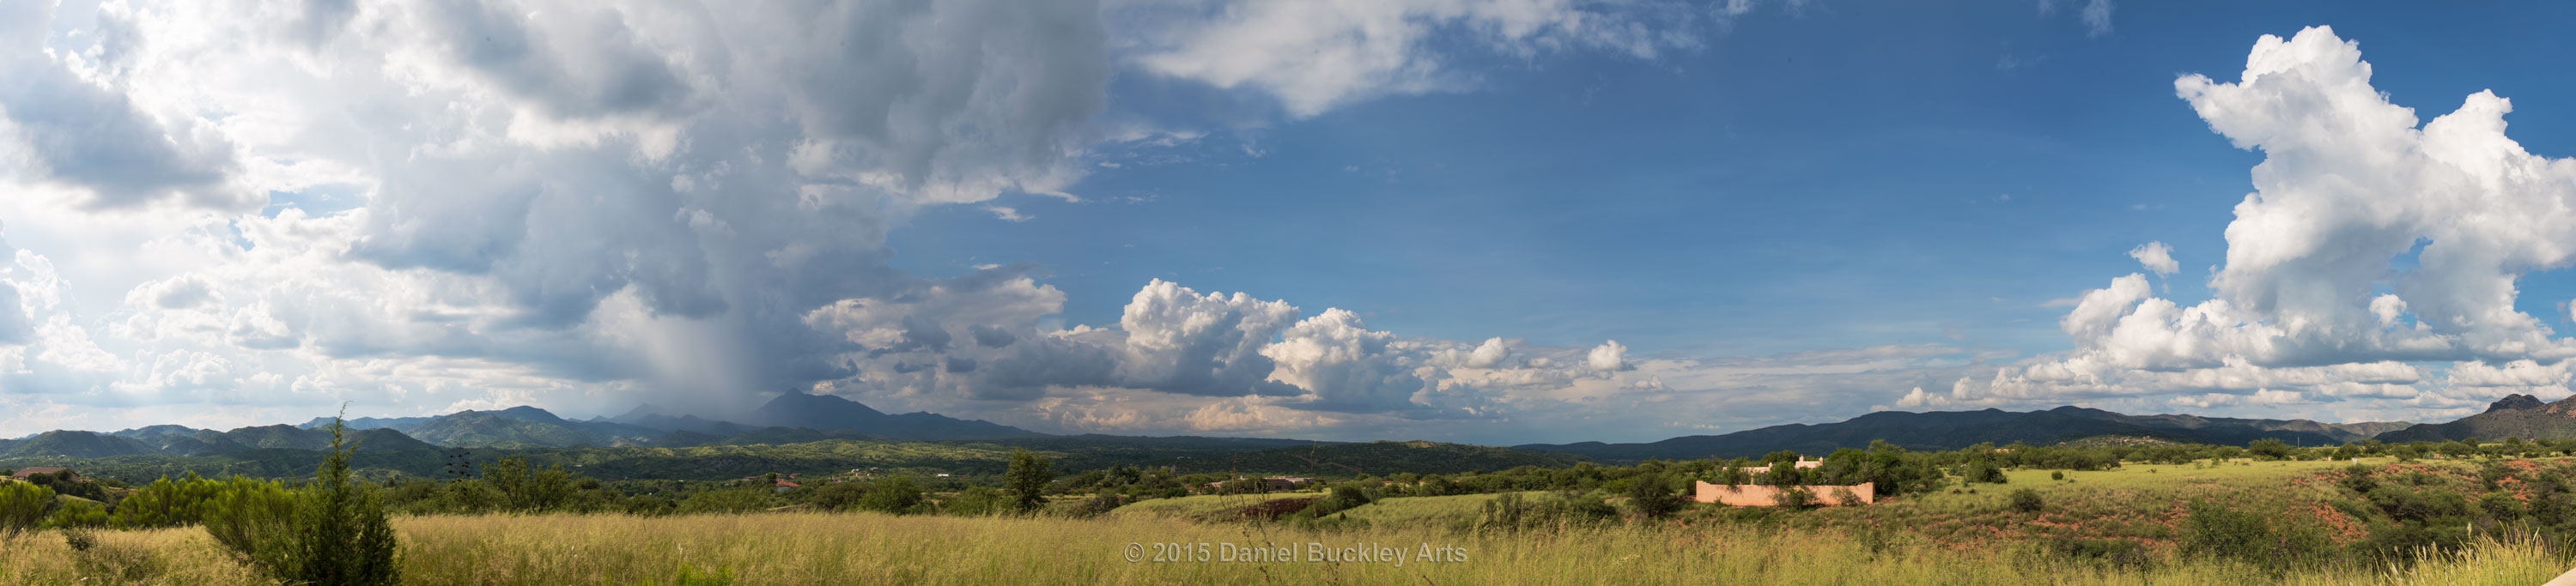
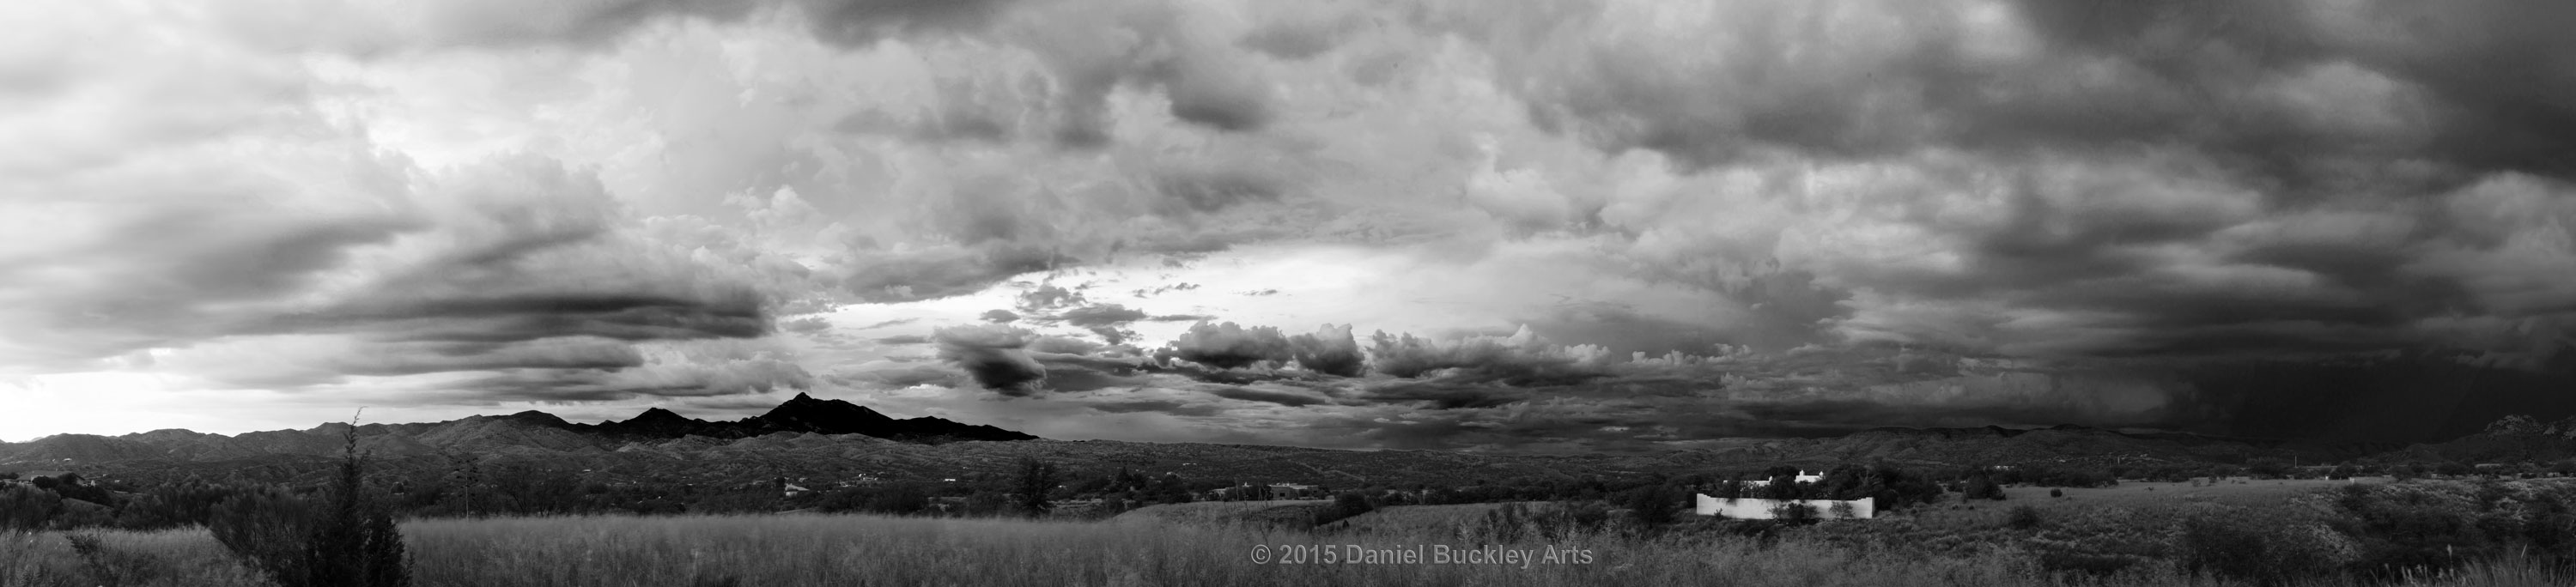
Patagonia 6:12 p.m.
If the framing is wide, it takes fewer frames to create the panorama of the horizon. If the shooting is tight, many more will be needed and the resulting panorama will be long and thin.
There are limitations as well in current Photoshop technology for assembling these panoramic composites. The file size of the Photoshop document can’t currently exceed 2 GB. Again, this is part of why I maintain a library of all of the original materials. There will come a time when I may be able to revisit them a create even larger, more detailed images.
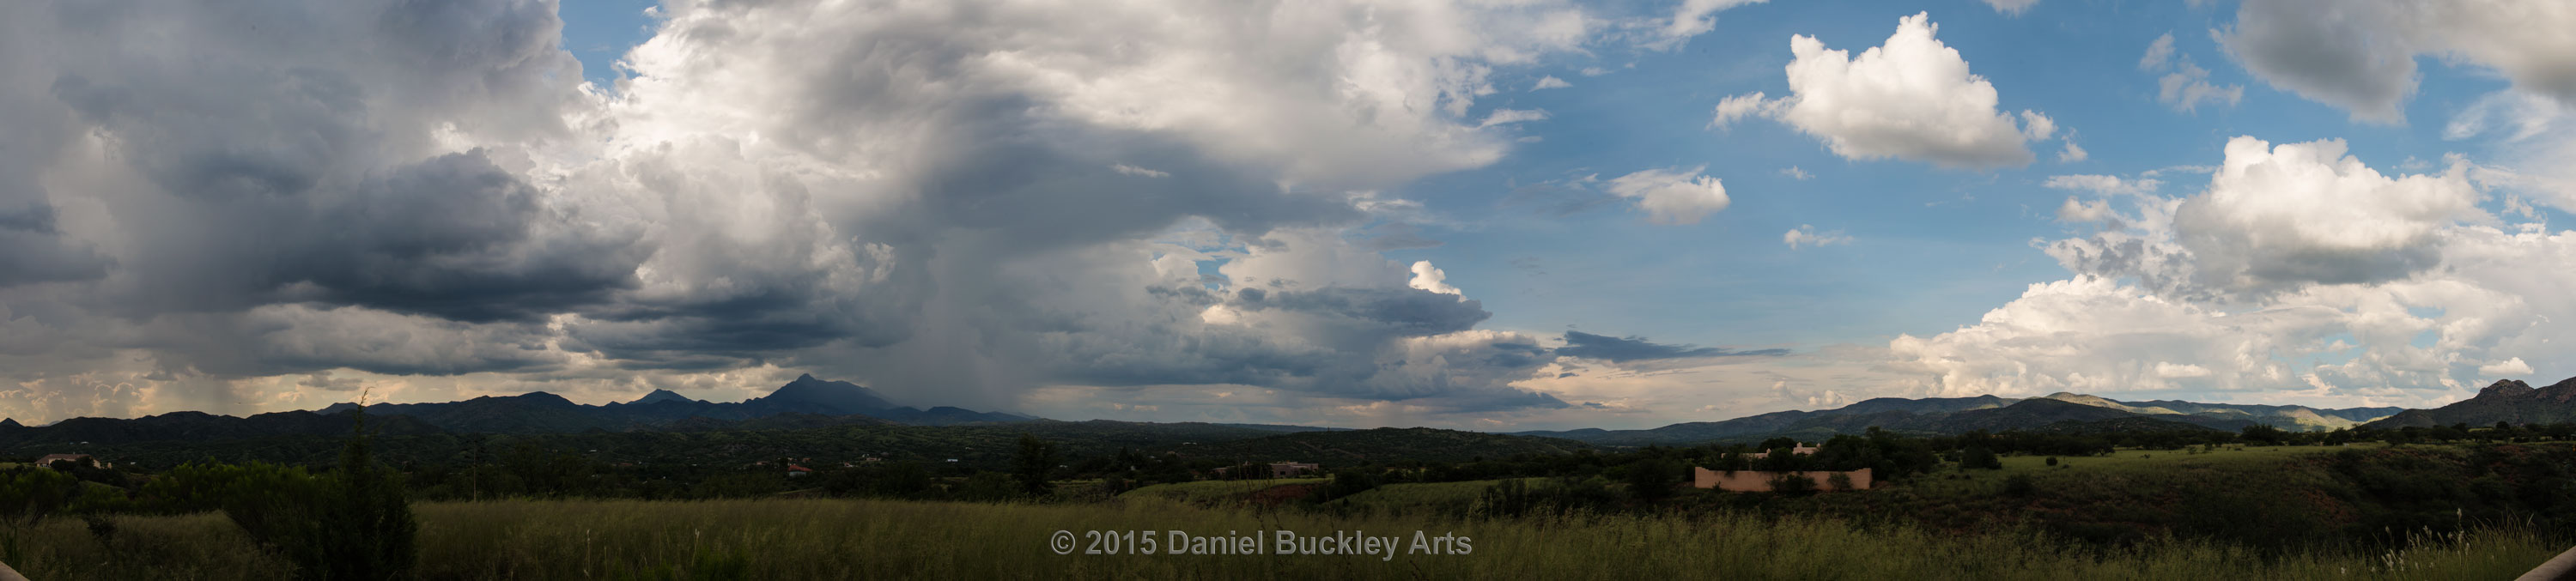
Patagonia 6:31 p.m.
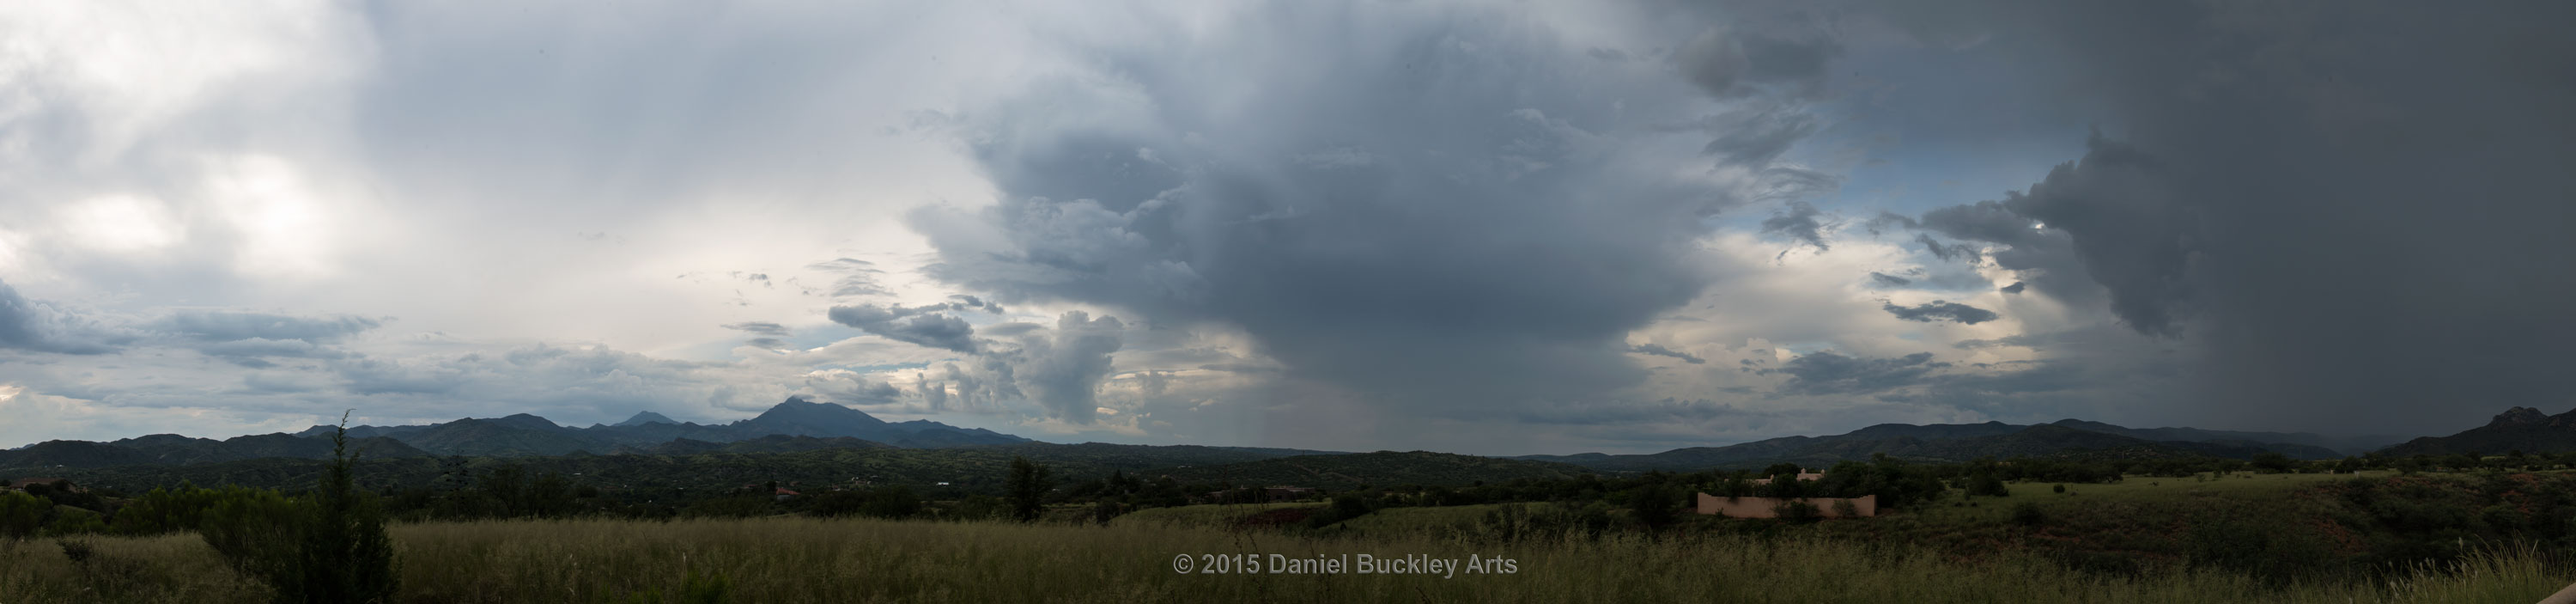
When I shoot panoramas I mount the camera carefully on a tripod and make sure that it is level. If you don’t, when it comes time to assemble them portions of the composite image will dip and rise, leaving a smaller usable continuous panoramic image area. A level tripod ensures the best margins.
Patagonia 7:21 p.m.
Once I am ready to shoot, I pan the camera across the horizon, looking through the view finder, and note the intensity of the brightest light is in the succession of shots to be made. I set the camera for that one bright frame in the series and don’t change it for the rest of the shots in that pan. In this way the light is balanced and shows its natural range over the view width.
On days like that particular Saturday I don’t vary the light level much, if at all, over the day’s shooting. I know that as clouds roll in, the images will get darker. And since I want to show how the light is changing over the course of the day, this is how you get it done. All manual controls with consistent levels. Using Camera Raw allows you to bring up the lighting if needed later.
Next I adjust my field of depth (usually between f11 and f16 to ensure the best clarity and depth across the images. After that the focus is set, fine tuned and the lens is restored to manual focus, with vibration reduction turned off.
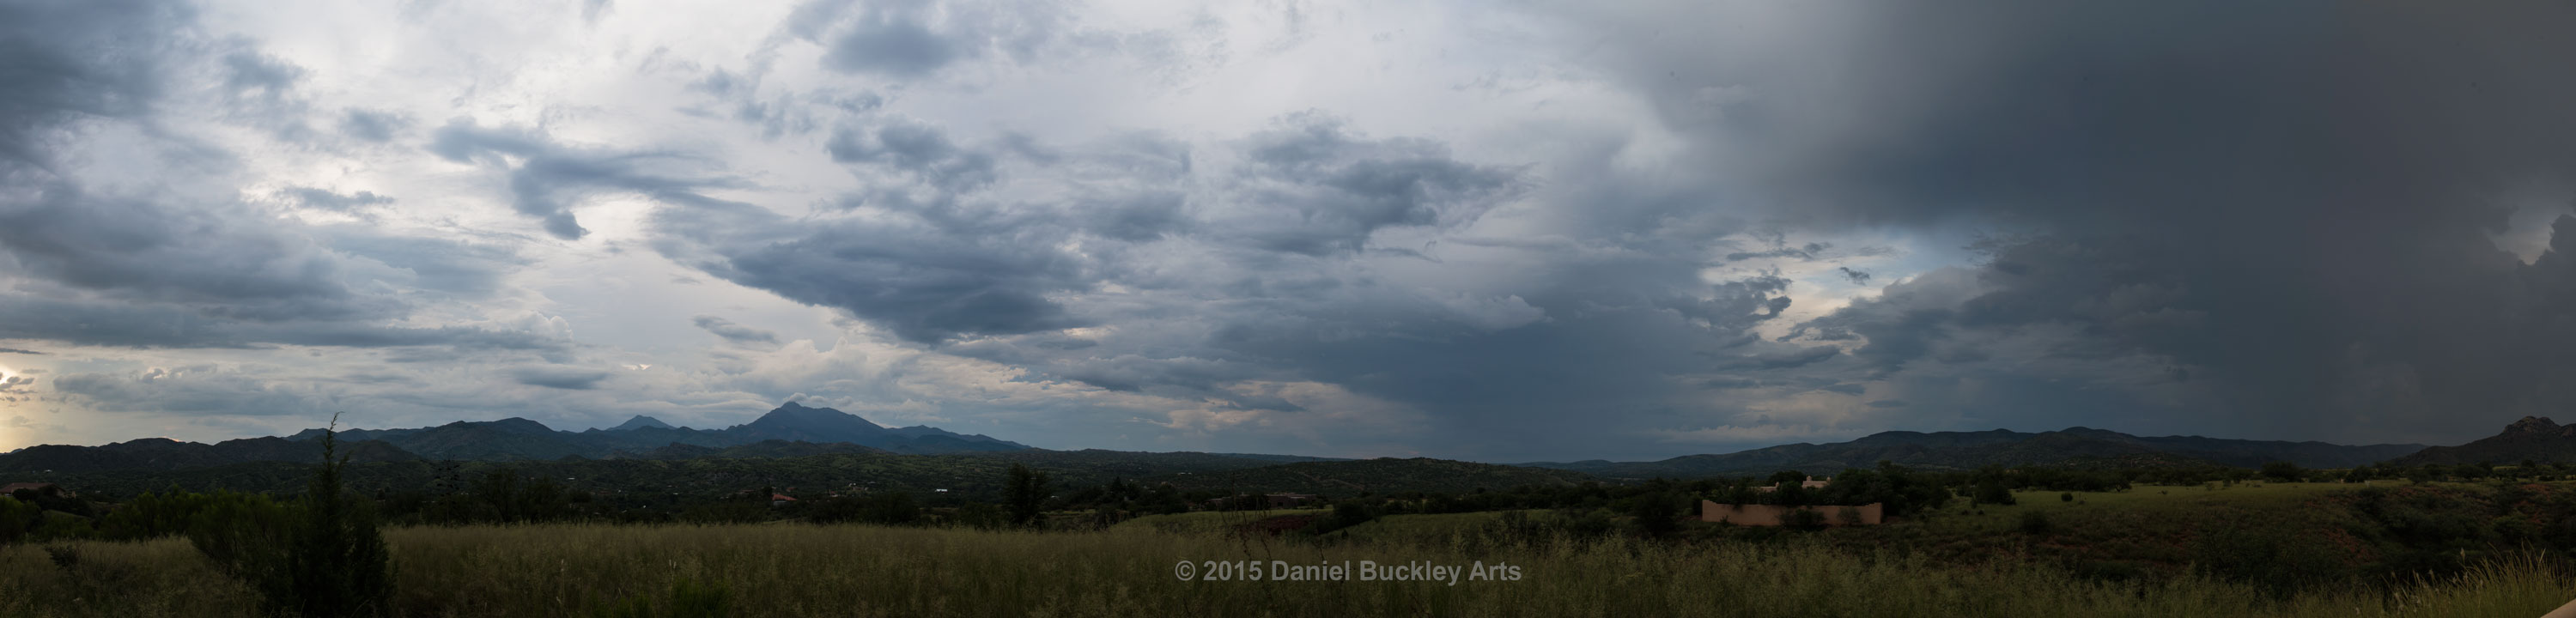
Patagonia 7:48 p.m.
Now I’m ready to shoot. I have a consistent focus, a consistent light level and a steady depth of field set up. I set up the first shot in the sequence as far left as boundaries will permit, often including those boundaries in the end images. I use a wired or wireless camera trigger to release the shutter. This further prevents vibration and yields a crisper image.
As the first image finishes, my eye is back in the viewfinder, locating a “landmarks” roughly 1/3 from the right edge. I pan the camera to the right until that landmark is located roughly 1/3 of the frame from the left side (to created an overlap) and shoot the next frame. This continues until I reach the right-most possible frame.
Patagonia 2:58 p.m.
Generally every 5-10 minutes for the rest of the day, I check the light again and add new frames to the succession, capturing the movement and transformation of clouds, the buildup and decline of storms, and the shadows at play with the moving sun and cloud patterns.
I leave a day like this will 700-800 frames in the main cameras used for panoramas. Typically I also shoot 3 or more hours of video at the same time, and many stills of details using a telephoto-equipped camera.

Patagonia 3:26 p.m.
As some point during the day I open the navigation software of my camera, locate my latitude and longitude and set the phone directly under the camera. After a few minutes of the GPS adjusting I shoot an image of the phone displaying the GPS coordinates in case I want to return to that vantage point.
Once home, it takes many hours to input all of the photos and video to the computer, and hours more (sometimes days) to get everything backed up, apply basic metadata, and catalog a big day’s catch.
Patagonia 3:56 p.m.
The photos are smaller, space wise, and input much faster than the video. While the video continues to ingest I use a slideshow software app to get a first glance of the images. If I’ve done my work right they are crisp, colorful and full of visual information.
But I generally don’t start assembling panoramas just yet.

Patagonia 4:20 p.m.
More often than not I take the video footage of the day, put it on an editing timeline and bump the frame rate up 5,000 percent. This makes the video 50 times shorter and 50 times faster. Now those moving clouds reveal their complex evolution, and shadows rolling across the landscape add to the changing images.
This tells me very quickly what I can expect in terms of the day’s panoramas, and helps me roughly locate the most spectacular moments.
Patagonia 4:30 p.m.
With that in mind I go through and assemble a first version of a couple of representative panoramas. It’s a little bit bewildering sometimes because on your Adobe Bridge palette you’re viewing the individual cells that will become the panorama. But you recall what your beginning and end areas were, often using such boundaries as the end of a building to help ID the elements of individual cells.
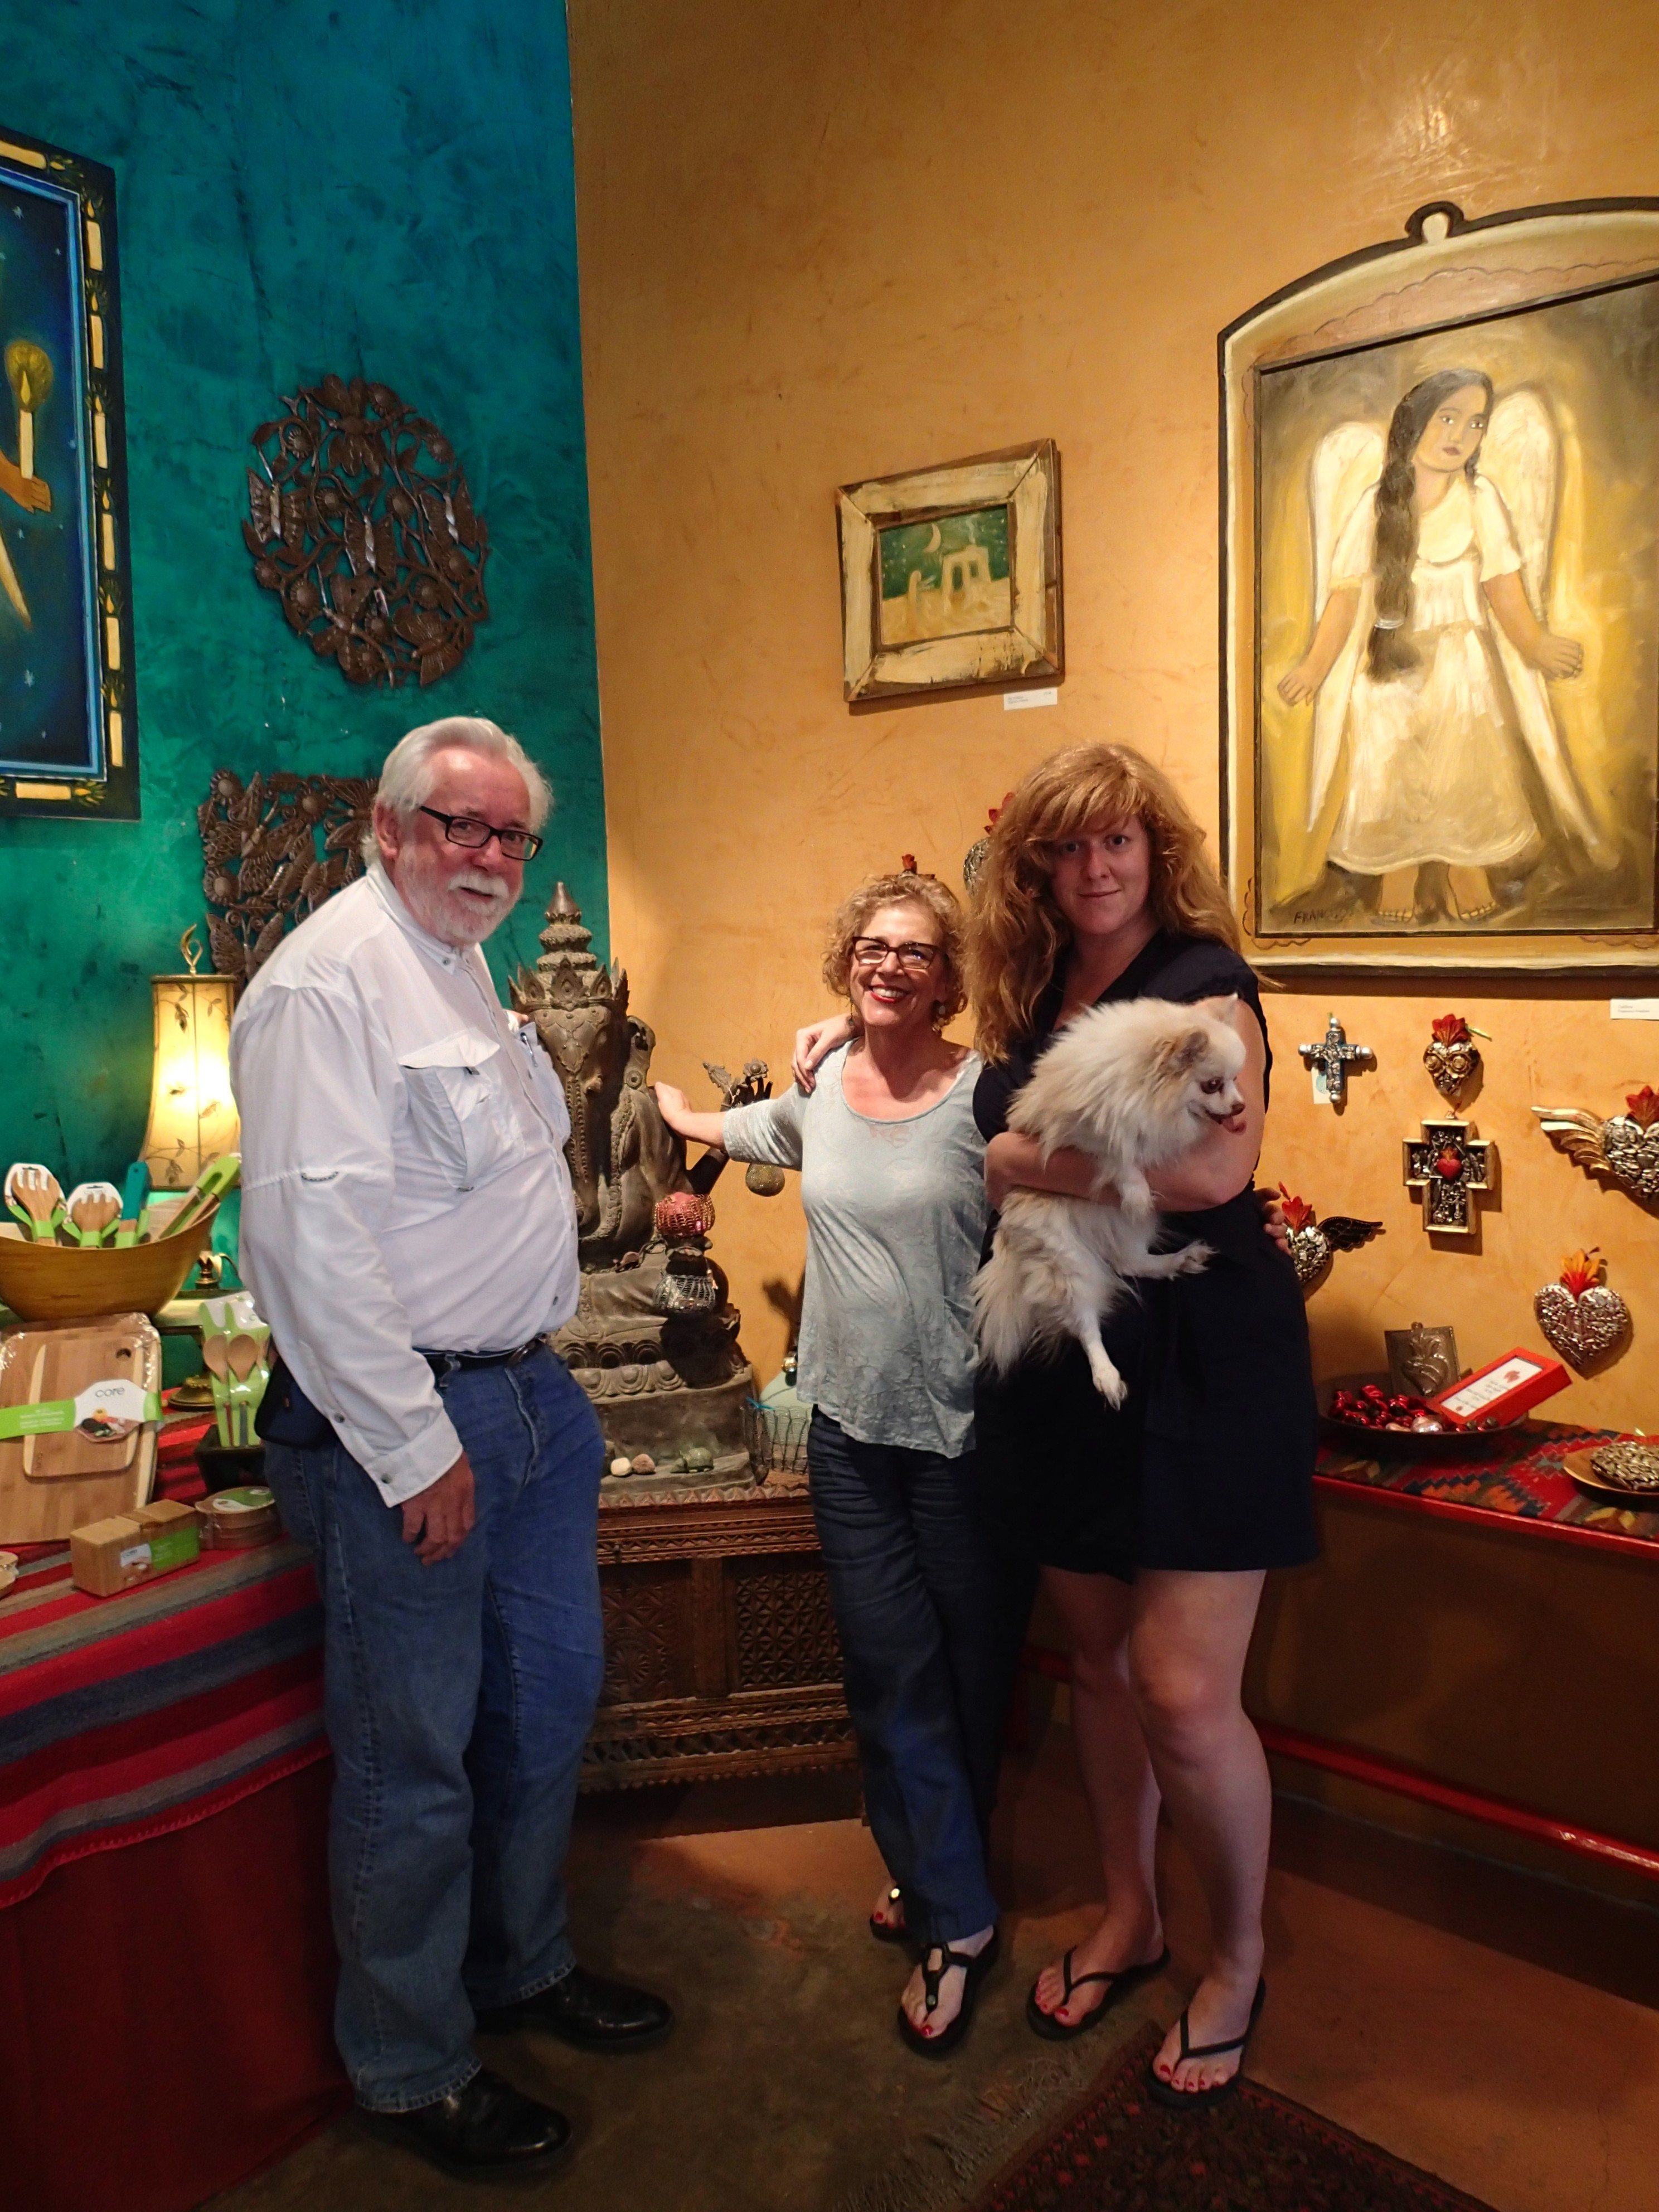
Daniel Buckley, Adrienne Halpert and Danielle Gilliland at Global Arts Gallery
One opens up the succession of images one by one, from left to right in the pattern. Each time dialogs regarding options within Photoshop for camera raw settings appear. I often open the brightest cell first, make whatever parameter adjustments are needed, and make note on which sliders and dialogs have been changed, and what the new settings are. Then I close that first image, go back to the leftmost image, open it, apply the chosen parameters for the bright image to it and all successive L-R images in the sequence and prepare to make the panorama.
Patagonia 4:43 p.m.
When all of the cells for an individual panorama have been opened and adjusted from left to right, go into the Photoshop File menu and scroll down to Automate. Enter its dialog and choose “Photomerge” from the options.
This opens up a new dialog. Press the button to import the photo cells you opened before, and let the fun begin.
Patagonia 4:57 p.m.
The initial stitched together panorama might be slightly oblong and a bit higher in the middle than on the sides. Use the crop tool to create the largest possible boundary for the panorama, and/or emphasize composition, and make the crop.
Now you can really have a look at what has been made. Use curves to bring out a bit more contrast, and perhaps vibrance to make the image pop a bit. And of course this is really the jumping off point. Get creative and have some fun. But don’t forget to save and back up your work.
Patagonia 5:11 p.m.
After a few days I usually return with fresh eyes to start looking at the bulk of the work. It can take a day or more to assemble the first versions of all of the panoramas. It is grunt work intended to give some sense of the scope of what was shot. But some beautiful things come from this phase.
I post some on Facebook or elsewhere on line, then set it aside again for a few days.
Patagonia 5:40 p.m.
Always in the process of assembling the first composite panoramas, some situation-specific techniques start to bubble up. After a few days rest, it’s time to explore that for a while and fine tune the images. This brings out a new batch of discoveries, that progresses down the line.
And another pause for a day or two.

Patagonia 6:02 p.m.
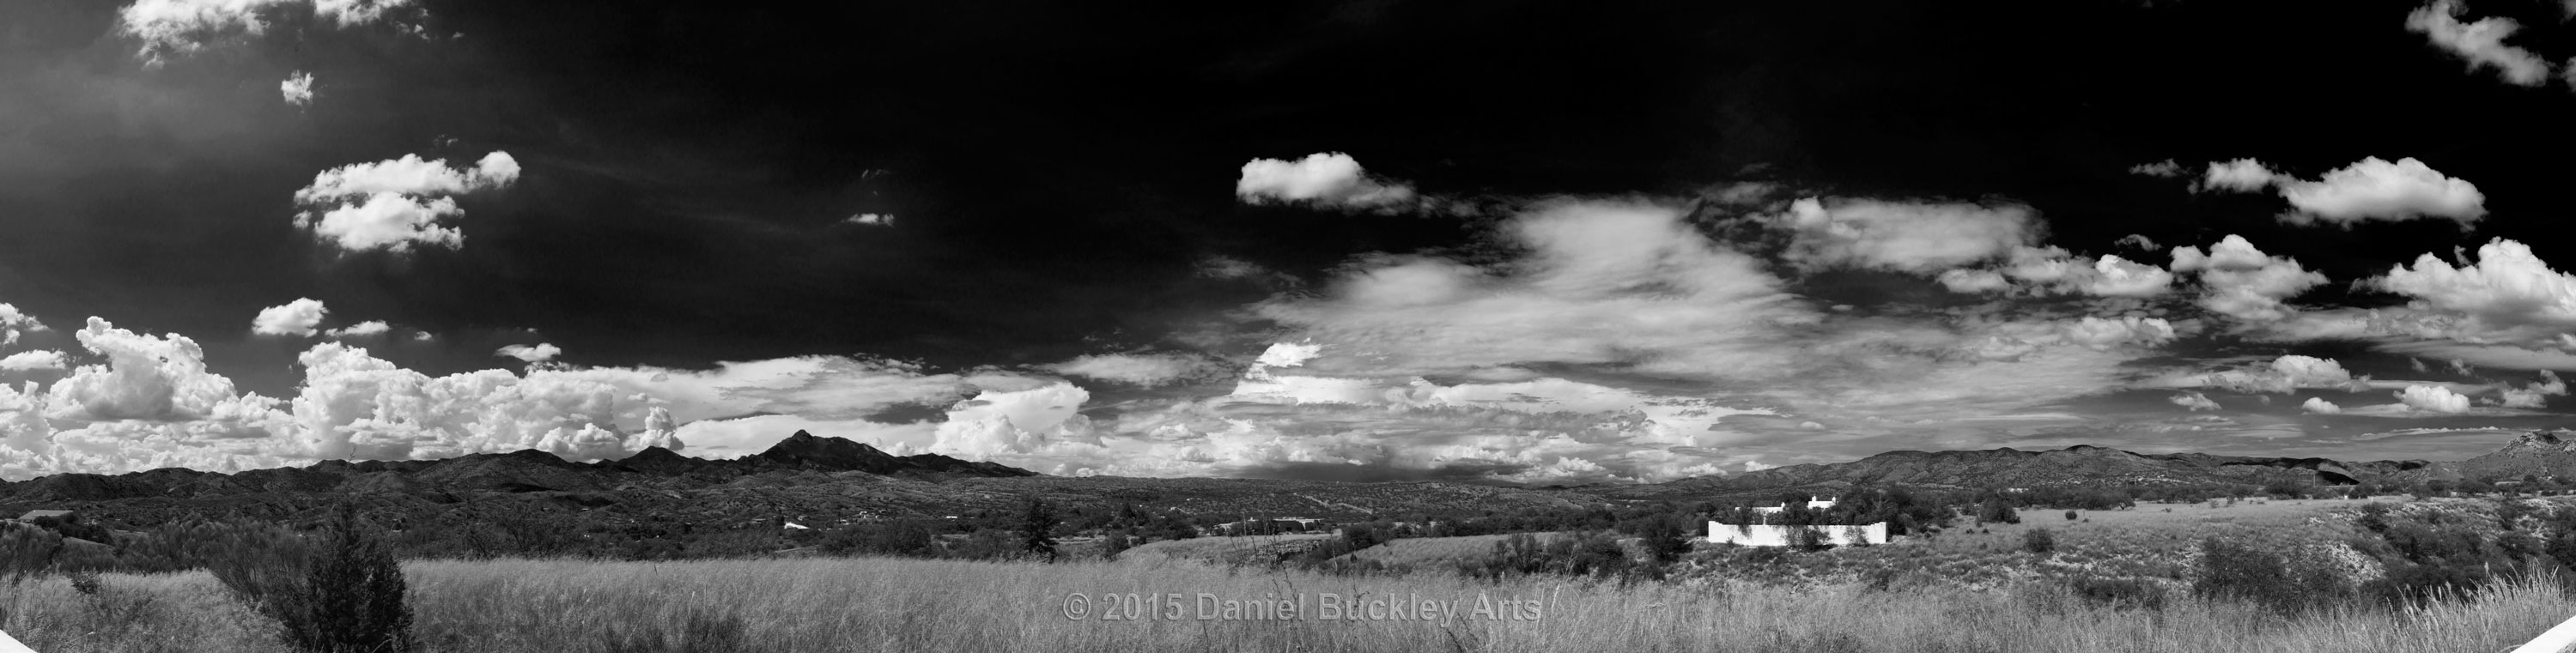
Now it’s time to revisit the panoramas and start making grayscale versions of them (B&W images). A spectacular photo in color can yield even more in Grayscale if one takes advantage of Photoshop’s tools.
I generally do two versions of each image initially. The first is a well-realized B&W image. The second experiments further to generate something vivid and borderline surreal.

Patagonia 6:12 p.m.
When I finish first versions each way from all of the images I close overnight.
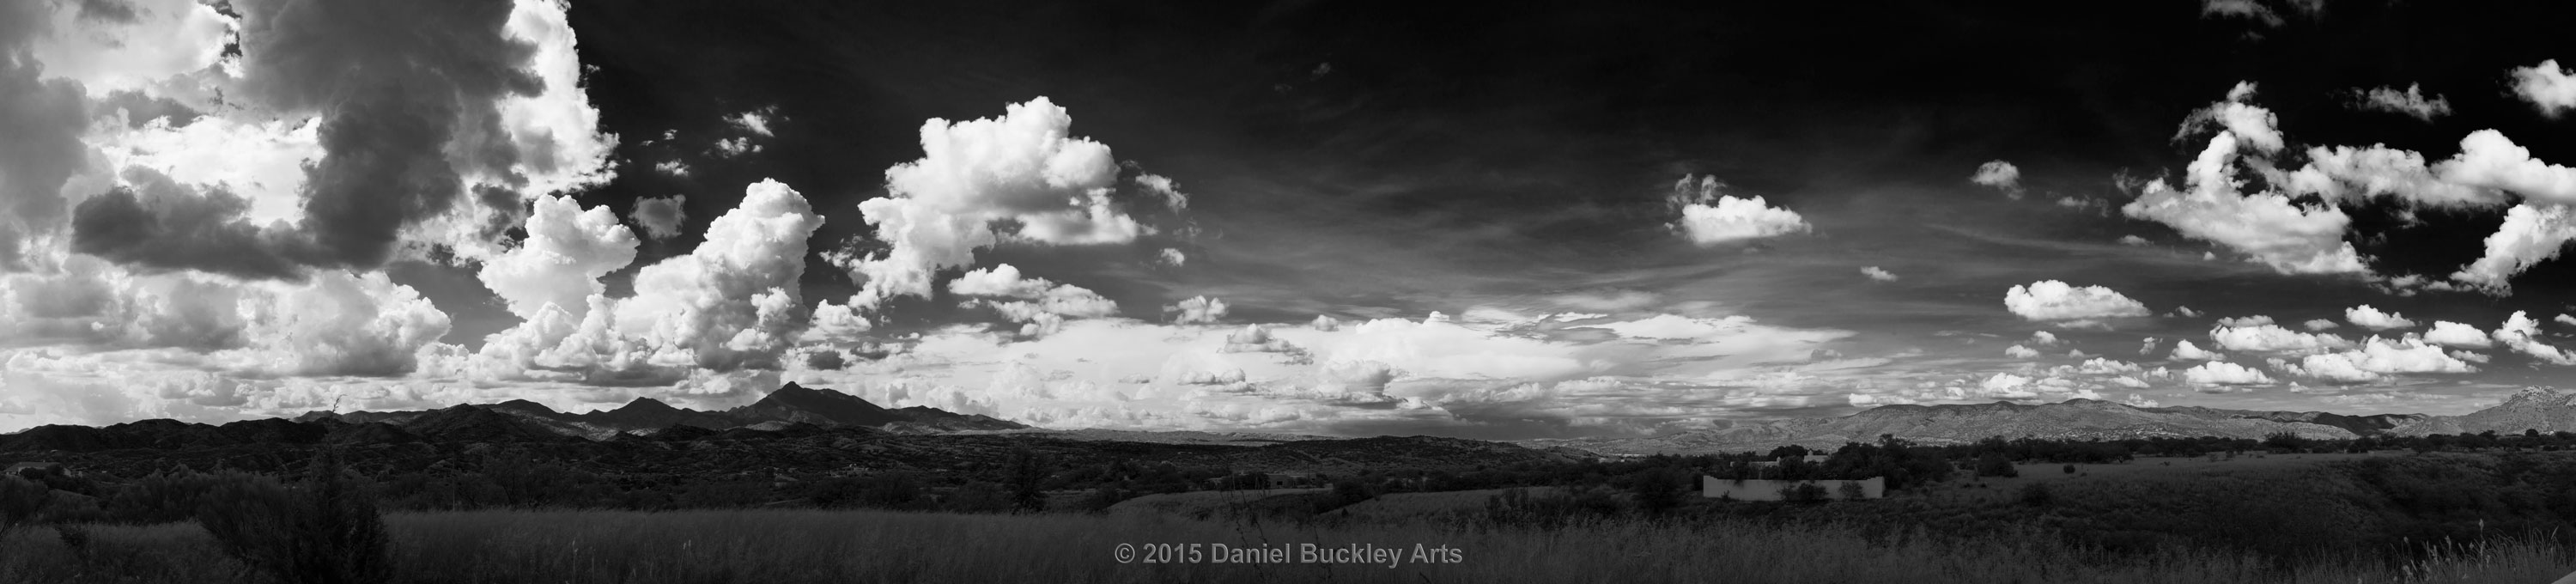
The following day I return and make fine refinements of each image, again using skills that evolve in the creation of the originals. I adjust the various color frequencies within the grayscale image to make details pop or recede. I examine contrasts, and work settings multiple times to get the best image I know how to make.
Patagonia 6:34 p.m.
Then they are set aside another few days before a final review process. Each image from the series – color or B&W – is examined closely, refined if needed, and categorized for quality and image impact.
Only then do I have a good idea of what has been created.
The process contributes on multiple fronts. It adds to my process-driven body of art, helping me better understand our dynamic world. It helps me advance my craft. And now and then it produces an extraordinary image.
Patagonia 7:25 p.m.
Like all artists, I am a work in progress. So is the world I shoot photos in. That is a very comfortable symbiotic relationship for me.
This work is very different from the film work.
Patagonia 7:48 p.m.
It is typically solitary. It takes me out of my usual environs. It puts me in areas of beauty and desolation. It carries my eye to new vistas.
But in the end it makes me a better film maker. It rests me from the chore at hand. It improves my eye as a videographer. It helps me stay focused on human time scales, develop proper chronologies and find the beauty in all that is shot.
 More about Daniel Buckley, Photographer.